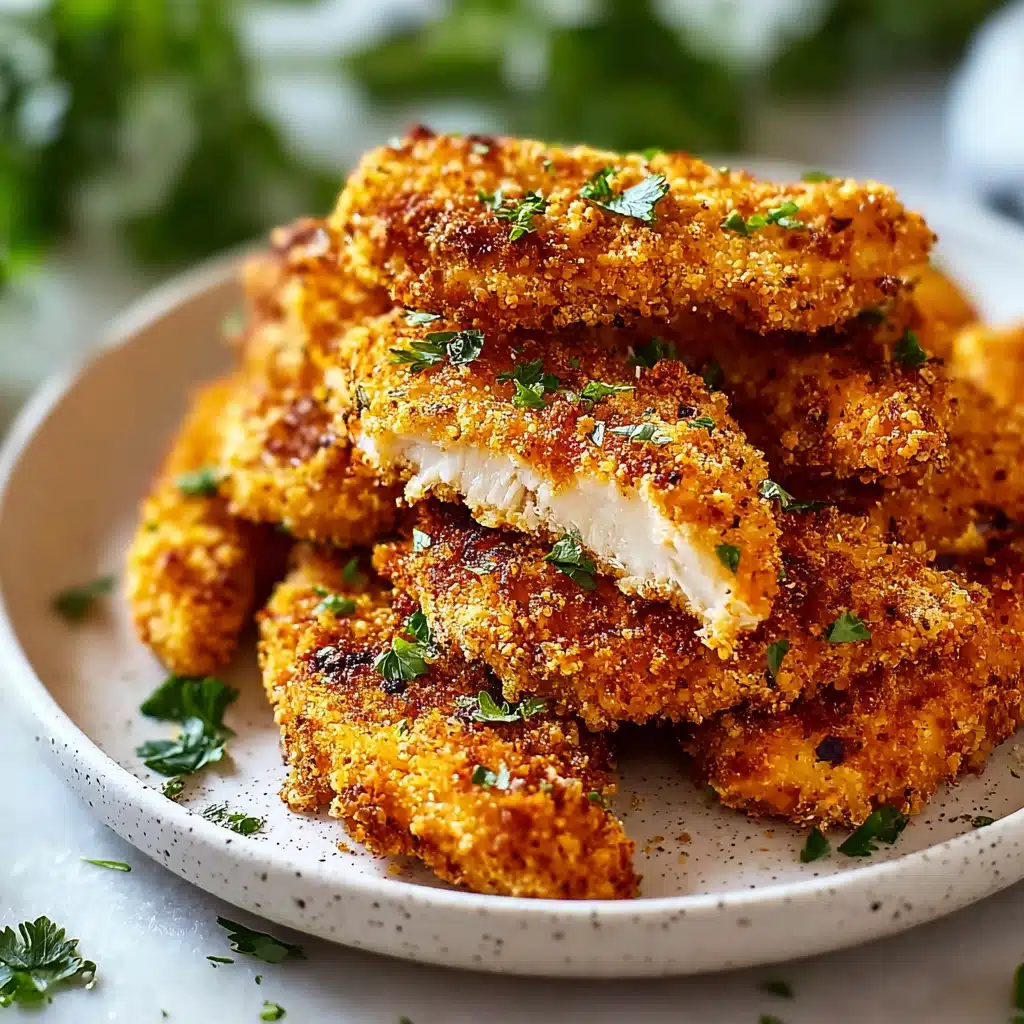
Crispy Baked Chicken Tenders Recipe
If you crave something that’s both satisfyingly crunchy and family-friendly, look no further than these Crispy Baked Chicken Tenders. Imagine biting into juicy strips of chicken wrapped in a golden, flavorful crust—every mouthful bursting with savory goodness and a delightful crunch. Best of all, this homemade favorite skips the fryer entirely, relying on simple ingredients and your trusty oven to create chicken tenders that are irresistible for both kids and adults. Whether you dip them in classic ranch or spicy BBQ, these tenders are a weeknight winner you’ll want to make again and again.
Ingredients You’ll Need
You’ll be amazed at how a handful of pantry staples come together to create show-stopping Crispy Baked Chicken Tenders. Each ingredient is chosen for the punch of flavor or the gorgeous crunch it adds, so don’t be shy—let every component shine!
- Chicken breasts or chicken tenders: The star of the show; use breasts cut into strips or buy pre-cut tenders for convenience and tenderness.
- Large eggs: Act as the glue, helping the breading stick and creating that crave-worthy coating.
- Panko breadcrumbs (or regular breadcrumbs): Panko brings that signature airy, crispy texture, but regular breadcrumbs work in a pinch.
- Grated Parmesan cheese (optional): Adds a boost of umami flavor and subtle richness—don’t skip if you love a cheesy note!
- Garlic powder: Layers in irresistible aromatic undertones for depth of flavor.
- Paprika: Infuses the tenders with a warm color and a touch of smoky sweetness.
- Onion powder: Adds savory complexity to the breading for a well-rounded taste.
- Salt: Essential for seasoning both the chicken and the coating—don’t underestimate its impact.
- Black pepper: Lends a subtle kick to wake up all the flavors.
- Olive oil spray: The secret to a golden, crackly finish without any deep-frying mess.
How to Make Crispy Baked Chicken Tenders
Step 1: Prep the Chicken
Start by getting your chicken ready: If you’re using whole chicken breasts, slice them into strips about one inch wide—think of classic tender size. If you managed to snag a pack of chicken tenders, you can skip straight to the fun part. Uniform strips mean every bite will bake up juicy and evenly cooked.
Step 2: Prepare the Breading Stations
Setting up your breading stations is a game-changer for both speed and mess control. Grab two shallow bowls: One for the beaten eggs (give them a good whisk until frothy), and another for panko, Parmesan (if you’re going for extra flavor), garlic powder, paprika, onion powder, salt, and pepper. Mixing all the seasonings right into the breadcrumbs ensures that every single bite is packed with taste.
Step 3: Season the Chicken
Before breading, sprinkle the chicken strips with a pinch of salt and pepper. This little step makes a big difference, ensuring every piece is fully seasoned all the way through—not just on the outside.
Step 4: Bread the Chicken
Dip each chicken strip into the beaten egg first, letting any excess drip off so the coating doesn’t get soggy. Next, press it into the panko mixture, turning to coat evenly. For those who love an ultra-crispy, thick crust, double-dip: repeat the egg and breadcrumb coating. It’s a bit messy, but totally worth it for the crunch!
Step 5: Prepare the Baking Sheet
Line a baking sheet with parchment paper or a silicone baking mat for stress-free cleanup. If you have a wire rack that fits on top, use it—this lifts the chicken and lets hot air circulate all around, guaranteeing a super crispy texture without any soggy bottoms.
Step 6: Arrange the Chicken on the Baking Sheet
Spread out your breaded chicken tenders on the prepared tray (or wire rack), leaving some space between each piece. Crowding the pan will prevent the heat from reaching all sides, so give them some room to crisp up beautifully.
Step 7: Bake the Chicken Tenders
Preheat your oven to 400°F (200°C) for that perfect golden finish. Just before baking, mist the tenders lightly with olive oil spray—this is the key to getting them extra crispy without deep frying. Bake for 20 to 25 minutes, flipping halfway through so both sides brown evenly. You’re looking for a gorgeous golden crust and, most importantly, an internal temperature of 165°F (74°C) for safely cooked chicken.
Step 8: Serve and Enjoy
Once your Crispy Baked Chicken Tenders emerge, let them rest for a couple of minutes to lock in the juices. Pile them onto a platter and serve immediately with your favorite dipping sauces—think honey mustard, creamy ranch, or a tangy barbecue. Every bite is sure to earn applause!
How to Serve Crispy Baked Chicken Tenders
Garnishes
A little garnish can turn this humble favorite into a showstopping centerpiece. Sprinkle with fresh chopped parsley or a dusting of extra Parmesan cheese before serving. Even a squeeze of lemon over the tenders just before eating can add an unexpected, bright pop that takes your Crispy Baked Chicken Tenders to a whole new level.
Side Dishes
Complete your meal by pairing these tenders with a medley of sides: think crispy oven fries, tangy coleslaw, or a big green salad tossed in a zesty vinaigrette. For something more comforting, creamy mashed potatoes or macaroni and cheese are always welcome alongside the tenders. The combination possibilities are endless and delicious!
Creative Ways to Present
Impress your guests (or just your family!) by serving the tenders in fun, unexpected ways. Try slicing them over a bed of leafy greens for a hearty chicken tender salad, tuck them into wraps or sandwiches for lunch on the go, or lay them out picnic-style with a trio of dipping sauces. The iconic crunch of Crispy Baked Chicken Tenders makes them endlessly versatile—and always crowd-pleasing.
Make Ahead and Storage
Storing Leftovers
If you’ve got extra chicken tenders, let them cool to room temperature first, then store them in an airtight container. They’ll keep well in the refrigerator for up to 3 days, making lunchtime or snacks later in the week a breeze. Just be sure to separate layers with parchment paper to keep the coating from getting soggy.
Freezing
Crispy Baked Chicken Tenders freeze incredibly well! Arrange the fully cooked, cooled tenders on a baking sheet and freeze until solid, then transfer to a freezer bag or container. This way, you can grab just a few at a time. They’ll stay fresh and tasty for up to 2 months, ready for quick meals whenever you need them.
Reheating
To revive your tenders’ signature crunch, skip the microwave and reheat them in the oven or air fryer at 375°F until heated through and crispy. If you’re in a pinch, a toaster oven works great, too. That way, every bite you reheat tastes as good as the first batch—no soggy breading allowed!
FAQs
Can I use chicken thighs instead of breasts or tenders?
Absolutely! Chicken thighs offer a juicier, slightly richer option for Crispy Baked Chicken Tenders. Just cut boneless, skinless thighs into strips, and follow the recipe as written. You might find the cooking time varies slightly, so check for that vital 165°F internal temp.
What’s the best way to get the coating to stick?
The secret is first drying your chicken strips with paper towels and then dipping them in the egg before breading. Press the panko mixture onto the chicken gently but firmly, and if you want extra insurance (and crunch!), double-dip: egg, then breadcrumbs, repeat.
Can I make these tenders gluten-free?
You certainly can! Swap in your favorite gluten-free breadcrumbs and double-check that your seasonings (including the Parmesan) are certified gluten-free. You’ll still get the full crunch and flavor without any gluten worries.
Do I need to flip the tenders while baking?
Yes, flipping halfway ensures that both sides get evenly browned and extra crisp. If your tenders are on a wire rack, you might get away without flipping, but for that perfect golden exterior, it’s well worth the quick mid-bake flip.
How can I tell when my Crispy Baked Chicken Tenders are done?
The best indicator is color and temperature: they should be golden brown and crisp all over, and the internal temperature should hit 165°F (74°C). If you’re unsure, cut into the thickest piece to make sure the juices run clear—no pink chicken allowed!
Final Thoughts
Once you see how easy and delicious these Crispy Baked Chicken Tenders are, they’ll quickly become a cherished part of your weeknight dinner rotation—or even a go-to party snack! Give them a try, share them with friends and family, and don’t forget to experiment with your favorite sauces and sides. Your oven is about to become the busiest spot in your kitchen!
Print
Crispy Baked Chicken Tenders Recipe
- Total Time: 40 minutes
- Yield: 4 servings 1x
- Diet: Halal
Description
These Crispy Baked Chicken Tenders are golden, juicy, and packed with flavor—all without frying! They feature a crunchy panko and Parmesan coating, savory spices, and bake up perfectly crispy in the oven. Serve them as a family-friendly main, a snack, or even as a party appetizer with your favorite dipping sauces.
Ingredients
Main Ingredients
- 1 lb chicken breasts or chicken tenders (cut into strips if using breasts)
- 2 large eggs (beaten)
Breading Mixture
- 1 cup panko breadcrumbs (or regular breadcrumbs)
- 1/2 cup grated Parmesan cheese (optional, for extra flavor)
- 1 tsp garlic powder
- 1 tsp paprika
- 1/2 tsp onion powder
- 1/2 tsp salt
- 1/4 tsp black pepper
Other
- Olive oil spray (for coating)
Instructions
- Prep the Chicken: If using chicken breasts, slice them into strips, each about 1-inch wide. If using ready chicken tenders, skip this slicing step.
- Prepare the Breading Stations: Set up two bowls—one with beaten eggs, and one combining panko breadcrumbs, Parmesan cheese, garlic powder, paprika, onion powder, salt, and black pepper.
- Season the Chicken: Lightly sprinkle your chicken strips or tenders with a pinch of salt and pepper to open up the meat’s savory flavor.
- Bread the Chicken: Dip each chicken strip in beaten egg, ensuring a full coat, and let any excess drip off. Then, coat in the breadcrumb mixture, pressing gently so crumbs adhere. For extra crunch, repeat the egg and breadcrumb steps for double coating.
- Prepare the Baking Sheet: Line a baking sheet with parchment paper or a silicone mat. For best crispiness, set a wire rack on top for better airflow.
- Arrange the Chicken: Place each breaded tender on the prepared sheet or rack, spacing them out so they cook evenly and turn crisp.
- Bake the Chicken Tenders: Preheat your oven to 400°F (200°C). Lightly spray the tenders with olive oil spray for extra crispiness. Bake for 20-25 minutes, flipping halfway through, until they are golden brown and crisp.
- Check for Doneness: Make sure the chicken reaches an internal temperature of 165°F (74°C) to ensure they are safely cooked and juicy inside.
- Serve and Enjoy: Remove from the oven and let rest for a few minutes. Serve warm with your favorite dipping sauces like honey mustard, BBQ, or ranch.
Notes
- Double-dipping (egg then crumbs again) gives a thicker, crunchier crust.
- Using a wire rack helps ensure even crispiness without soggy bottoms.
- Panko breadcrumbs yield a crunchier result than regular breadcrumbs.
- Add dried herbs or chili flakes to the breadcrumb mixture for variety.
- Leftovers can be reheated in the oven or air fryer to retain crunch.
- Prep Time: 15 minutes
- Cook Time: 25 minutes
- Category: Main-course
- Method: Baking
- Cuisine: American
Nutrition
- Serving Size: 1/4 recipe (about 2-3 tenders)
- Calories: 280
- Sugar: 1g
- Sodium: 540mg
- Fat: 9g
- Saturated Fat: 2.5g
- Unsaturated Fat: 5g
- Trans Fat: 0g
- Carbohydrates: 18g
- Fiber: 1g
- Protein: 32g
- Cholesterol: 115mg
Keywords: baked chicken tenders, oven fried chicken, crispy chicken strips, healthy chicken tenders, kid friendly dinner, party appetizers
