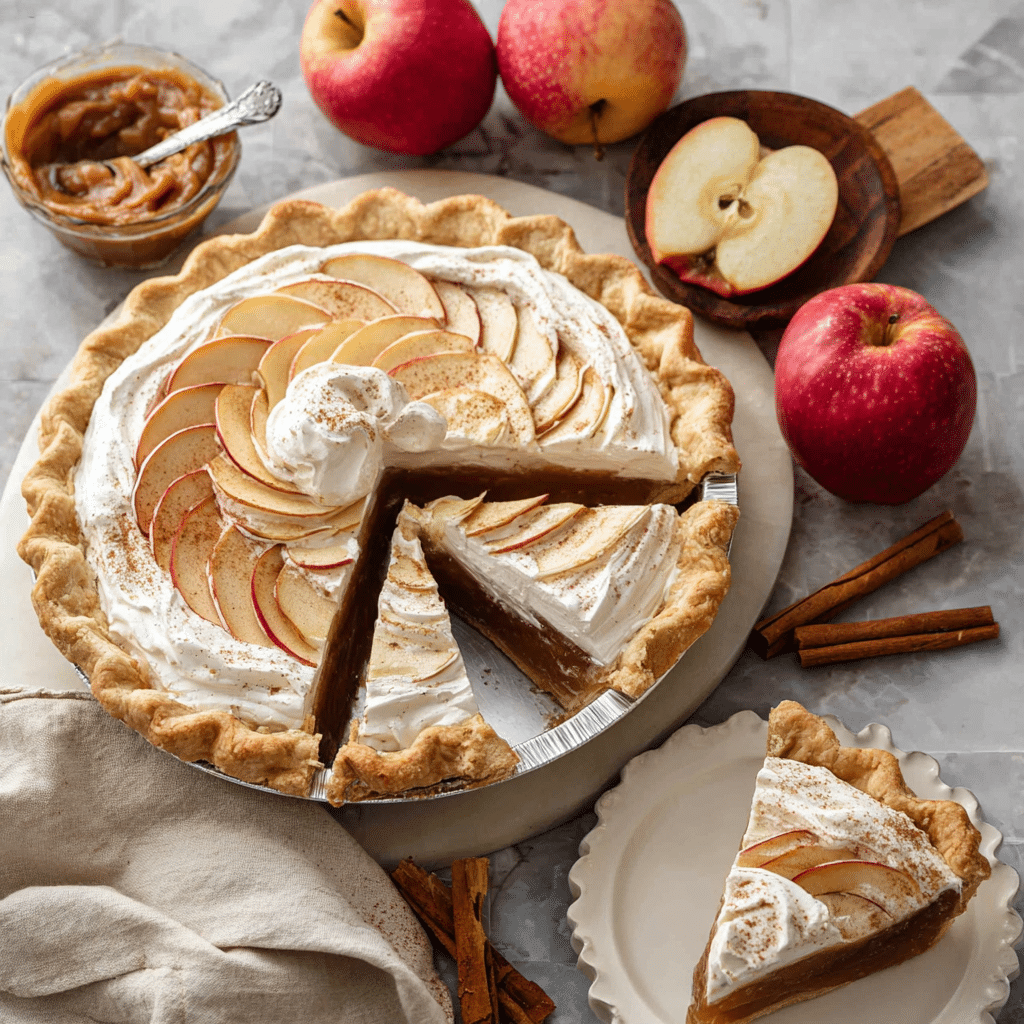
Apple Butter Pie Recipe
If you adore the deep, spiced flavor of apple butter, get ready for your new favorite autumn treat: Apple Butter Pie. This pie has all the cozy notes of apple season wrapped in a silky, custardy filling, nestled into a flaky homemade crust. With a ripple of cinnamon whipped cream and a swirl of extra apple butter on top, every forkful brings pure comfort. Whether you’re celebrating a crisp fall day or bringing dessert to a gathering, Apple Butter Pie never fails to win raves from everyone at the table.
Ingredients You’ll Need
This Apple Butter Pie relies on a handful of baking staples and a jar of deeply spiced apple butter. Each simple ingredient plays its part in creating the pie’s irresistible flavor and texture—from the flaky crust to the creamy filling and cloud-like whipped topping.
- All-purpose flour: Essential for both the tender crust and a touch in the filling to bind everything beautifully.
- Unsalted butter (cold): The star of any great pie crust, lending flakiness and rich flavor when kept perfectly chilled.
- Kosher salt: Brings out the richness in both the crust and the filling; don’t skip it!
- Ice water: Makes the dough come together and keeps the butter from softening, which is the secret to a light, flaky crust.
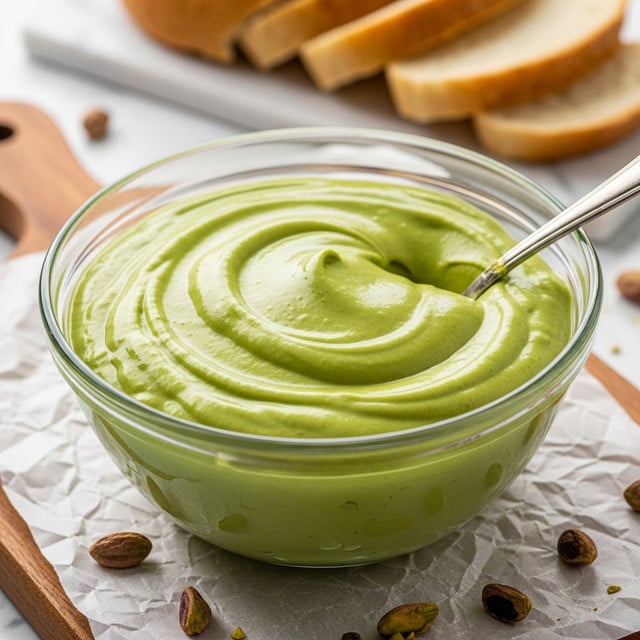
- Apple butter: The heart and soul of our Apple Butter Pie—packed with caramelized apples, cinnamon, and spice.
- Large eggs (room temperature): Binds the filling and gives it that custardy, sliceable texture.
- Dark brown sugar: Adds a touch of molasses depth, complimenting the apple butter’s natural sweetness.
- Vanilla paste or extract: Brings warmth and fragrance to both the pie and the whipped cream.
- Sweetened condensed milk: Creamy and sweet, this ensures a lush filling that bakes up smooth and thick.
- Heavy whipping cream: Used for an unbelievably fluffy cinnamon whipped cream topping.
- Powdered sugar: Sweetens the whipped cream with zero graininess.
- Ground cinnamon: Infuses the whipped cream with an aromatic hint of autumn spice.
How to Make Apple Butter Pie
Step 1: Prep Your Butter and Water
Start by cutting your butter into half-inch cubes and stashing it in the freezer for about 15 minutes. Meanwhile, fill a bowl with a cup of water and a generous handful of ice cubes—icy water helps keep your pie crust extra flaky. These few minutes of prep make all the difference when it comes to pie dough perfection.
Step 2: Make the Pie Dough
Add your flour and salt to a food processor and give them a quick pulse to mix. Scatter the chilled butter cubes evenly over the flour, then pulse until the mixture looks like coarse, sandy crumbs with some pea-sized pieces of butter remaining. This is what makes the crust delightfully crisp and tender.
Step 3: Add the Ice Water and Shape
Measure out 2/3 cup of your ice-cold water (avoiding the ice cubes), and drizzle it slowly through the processor chute as you pulse. Reserve one tablespoon in case the dough comes together early. Stop pulsing as soon as the dough starts to clump in shaggy crumbles; it should press together easily but not feel wet. Divide the dough in half, wrap each in plastic, and form into 1-inch-thick discs. Only one is needed here—freeze the other for your next pie adventure!
Step 4: Chill and Roll Out the Dough
Let your dough disc firm up in the fridge for 1 to 2 hours (or overnight if you’re planning ahead). When ready, give it 15 minutes on the counter to soften just a bit so it’s easier to handle. Dust your work surface and rolling pin with flour, then roll out to 1/8-inch thickness and a couple of inches beyond the size of your pie dish, rotating often for even thickness.
Step 5: Transfer and Shape Your Crust
Gently transfer your dough to the pie dish, pressing it softly into the bottom and sides. Leave about a 1-inch overhang, trim with kitchen shears, then fold the edges under themselves at the rim and crimp as fancily or rustically as you please. Pop the crust in the freezer for 15 minutes—cold dough holds a better shape when baked.
Step 6: Par-bake the Pie Shell
Take your chilled crust from the freezer, prick the base all over with a fork (this prevents bubbles), then line with parchment paper and fill with pie weights or dried beans. Bake at 375℉ (190℃) for 15 minutes, remove weights, then bake 5 more minutes for a golden, crisp base. This step guarantees no soggy bottoms!
Step 7: Prepare the Apple Butter Filling
Lower the oven to 325℉ (163℃). In a large bowl, whisk together apple butter, eggs, brown sugar, flour, and vanilla until smooth. Add all the sweetened condensed milk—scraping every last bit from the can—and whisk again until silky. You’ll recognize the heavenly scent right away!
Step 8: Bake the Apple Butter Pie
Pour the luscious apple butter batter into your par-baked crust and bake in the center of the oven for 30 minutes. Then, move the pie to the lower third of the oven and continue baking 10 to 15 minutes more. The center should look set but still have a gentle little jiggle when nudged—think pumpkin pie consistency.
Step 9: Cool the Pie Completely
Set the pie on a wire rack and let it cool for at least three hours (or chill in the fridge for quicker results). Cooling is crucial for clean slices and a perfectly set filling, so resist the urge to dive in early!
Step 10: Whip Up Cinnamon Whipped Cream
Just before serving your Apple Butter Pie, whisk heavy cream, powdered sugar, cinnamon, and a splash of vanilla together (a stand mixer makes it extra easy). Whip until soft but slightly stiff peaks form—this makes for an irresistible cloud that floats right over the spicy apple flavors.
Step 11: Garnish and Serve
Spread a generous layer of cinnamon whipped cream over the cooled pie, then dot with a few spoonfuls of extra apple butter and lightly swirl it in. For pro slices, wipe your knife between each cut, and prepare yourself—everyone will want seconds!
How to Serve Apple Butter Pie
Garnishes
A cloud of cinnamon whipped cream is classic, but try sprinkling on some toasted pecans, a drizzle of caramel, thin apple slices, or even a pinch of extra ground cinnamon for an eye-catching finish. These touches add flavor, crunch, and a little wow factor to your Apple Butter Pie.
Side Dishes
Although Apple Butter Pie easily stands alone, it’s wonderful accompanied by a hot cup of apple cider, chai tea, or fresh coffee. For a festive dessert board, add candied nuts, cheddar cheese slices, or crisp fall fruits. The pie’s mellow sweetness pairs well with both sweet and savory partners!
Creative Ways to Present
For a showstopping presentation, serve mini Apple Butter Pies in individual tart pans or mason jars. For gatherings, slice the pie into slender wedges and set out a toppings bar with whipped cream, extra apple butter, and chopped spiced nuts. Or, try stacking on a scoop of vanilla or caramel ice cream for a truly decadent touch.
Make Ahead and Storage
Storing Leftovers
Apple Butter Pie actually gets even better with a little time in the fridge, making it an ideal make-ahead dessert. Wrap any leftover slices tightly with plastic wrap or cover the pie dish, and store in the refrigerator for up to 4 days. The flavors deepen and the texture stays perfectly smooth and creamy.
Freezing
This pie can be frozen for longer storage. To freeze, skip the whipped cream, wrap the cooled pie (whole or in slices) in several layers of plastic wrap and a layer of foil. Freeze for up to 2 months. When you’re ready, thaw overnight in the fridge before adding the whipped topping.
Reheating
If you prefer your Apple Butter Pie slightly warm, gently heat slices in a 300℉ (150℃) oven for 10 to 15 minutes, or in the microwave for 15-second bursts. Top with fresh whipped cream after reheating for the best texture and flavor.
FAQs
Can I use store-bought pie crust instead?
Absolutely! If you’re short on time, a quality store-bought crust works just fine. The homemade crust simply adds extra flakiness and flavor, but the star is really the apple butter filling.
What kind of apple butter is best for this pie?
Choose a thick, dark, richly spiced apple butter for the deepest flavor. Homemade is fantastic, but any quality jarred version from the store will also yield delicious results!
Can I substitute evaporated milk for sweetened condensed milk?
For this recipe, stick with sweetened condensed milk. Its sweetness and creamy texture are essential to the rich custard filling, and swapping in evaporated milk would make the pie less sweet and much looser.
Why does my crust shrink or slump when baking?
If your pie crust tends to shrink, make sure to chill it thoroughly before baking, use plenty of pie weights, and avoid stretching the dough in the pan. Proper chilling and a gentle fit will help your crust keep its beautiful shape.
How far in advance can I make Apple Butter Pie?
You can bake the pie up to two days ahead and refrigerate it until ready to serve. Add the fresh whipped cream and apple butter swirl just before serving for the ultimate texture and appearance.
Final Thoughts
I can’t recommend this Apple Butter Pie enough for anyone who loves the cozy aromas and flavors of fall baking. It’s surprisingly easy to make, irresistibly creamy, and guaranteed to become a family favorite. Let yourself get creative with toppings, and don’t forget to savor those deeply spiced, apple-rich bites—you’re sure to be making this pie over and over again!
Print
Apple Butter Pie Recipe
- Total Time: 1 hour 30 minutes
- Yield: 1 pie (8 servings) 1x
- Diet: Vegetarian
Description
Indulge in the rich, comforting flavors of Apple Butter Pie with a buttery crust and a luscious apple butter filling topped with cinnamon whipped cream.
Ingredients
For the Crust:
- 3¼ cups all-purpose flour (390g)
- 1 cup + 6 tablespoons unsalted butter (cold 311g)
- 1 teaspoon kosher salt
- ⅔ cup water ice (cold 5.3oz)
For the Filling:
- 1½ cups apple butter (482g, plus extra for topping)
- 3 large eggs (room temperature)
- ¼ cup dark brown sugar (50g)
- 1 tablespoon all-purpose flour
- 1 teaspoon vanilla paste or extract
- 14 oz sweetened condensed milk (1 can)
For the Cinnamon Whipped Cream:
- 1 cup heavy whipping cream (240ml)
- 2 tablespoons powdered sugar (15g)
- 1 teaspoon ground cinnamon
- 1 teaspoon vanilla paste or extract
Instructions
- Prepare the Crust: Cut cold butter into cubes, chill; mix flour and salt; pulse butter with flour; add cold water gradually, pulse until dough forms.
- Roll Out the Dough: Divide dough, chill, then roll out to desired thickness and size; transfer to pie dish.
- Par Bake the Crust: Freeze, dock with fork, fill with weights, bake until set.
- Prepare the Filling: Mix apple butter, eggs, sugar, flour, and vanilla; add condensed milk, mix.
- Bake the Pie: Pour filling into crust, bake until set.
- Make Cinnamon Whipped Cream: Whip cream, sugar, cinnamon, and vanilla until stiff peaks form.
- Finish the Pie: Spread whipped cream on cooled pie, swirl in extra apple butter; slice and serve.
Notes
- For a more intense apple flavor, consider using homemade apple butter.
- Ensure the pie is fully cooled before slicing for clean, neat servings.
- Prep Time: 30 minutes
- Cook Time: 1 hour
- Category: Dessert
- Method: Baking
- Cuisine: American
Nutrition
- Serving Size: 1 slice of pie
- Calories: 470
- Sugar: 28g
- Sodium: 230mg
- Fat: 24g
- Saturated Fat: 15g
- Unsaturated Fat: 7g
- Trans Fat: 0g
- Carbohydrates: 59g
- Fiber: 1g
- Protein: 6g
- Cholesterol: 125mg
Keywords: Apple Butter Pie, Cinnamon Whipped Cream, Dessert Recipe


