Brownie Ice Cream Cake Recipe
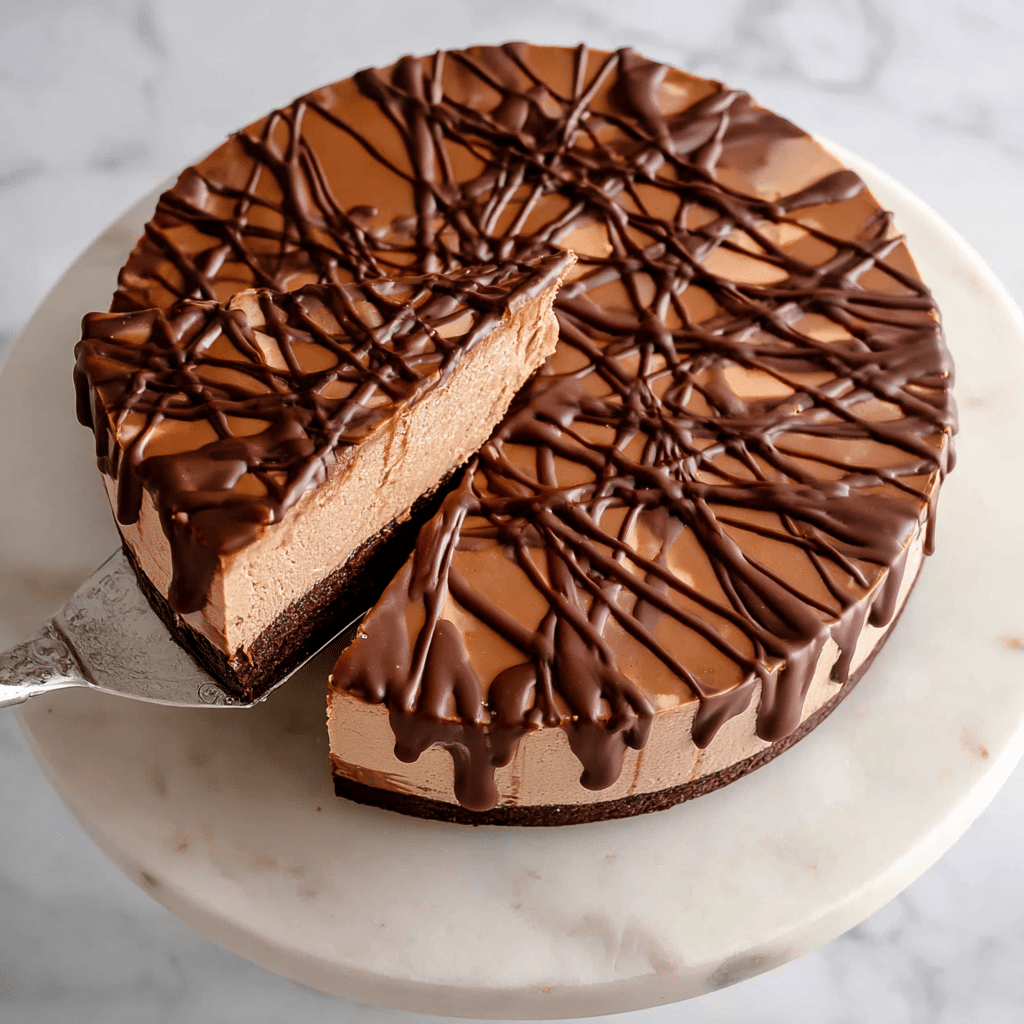
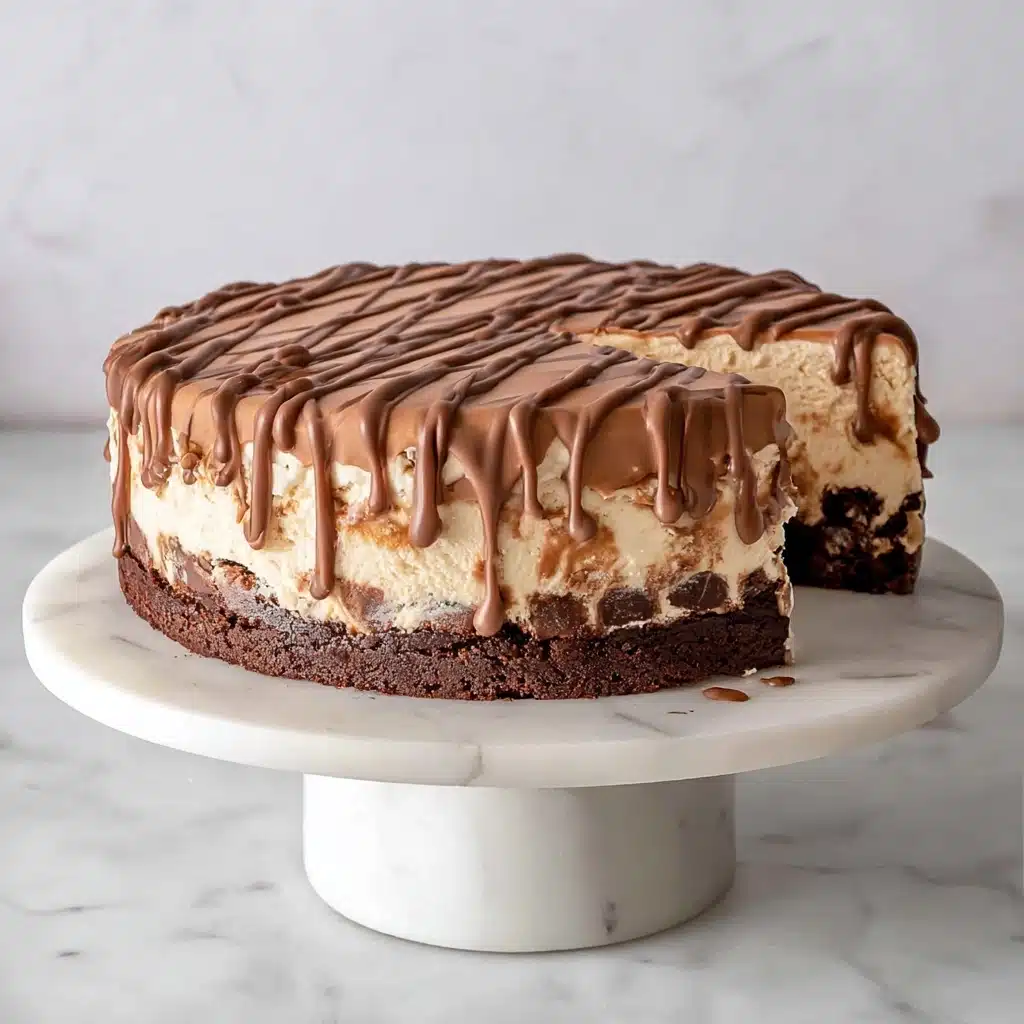
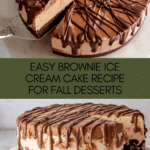
If you’re searching for the ultimate showstopper dessert, look no further than this Brownie Ice Cream Cake Recipe. It brings together the rich, fudgy goodness of a homemade brownie base with layers of creamy, dreamy ice cream, finished off with decadent chocolate fudge and a magical shell topping that hardens just right. Whether it’s for a special celebration or a sweet treat to wow your loved ones, this cake offers a perfect balance of texture and flavor in every bite. Trust me, once you try this recipe, it’ll become your go-to indulgence for warm days, cool nights, or any time you want to feel a little extra sweet joy.
Ingredients You’ll Need
Don’t let the simplicity of these ingredients fool you. Each one plays an essential role in creating the perfect balance of richness, moisture, and texture that makes this Brownie Ice Cream Cake Recipe so irresistible. From the deep chocolate flavor of cocoa powder to the creamy ice cream and smooth fudge, every component is a star.
- All-Purpose Flour: Provides the structure needed for that perfect brownie bite without being too dense.
- Sugar: Adds just the right amount of sweetness to balance the cocoa’s bitterness.
- Unsweetened Cocoa Powder: The key to that rich, chocolatey depth in your brownie base.
- Baking Soda: Helps the brownies rise just enough for a tender crumb.
- Pinch Salt: Enhances all the flavors, making the chocolate taste more vibrant.
- Cooking Oil: Keeps the brownies moist and tender—vegetable, canola, or avocado oil all work beautifully.
- Water: Balances the batter and keeps the brownies from being dry.
- Pure Vanilla Extract: Adds a lovely sweetness and depth that complements the chocolate.
- Ice Cream: Choose your favorite flavor (vanilla, chocolate, or something fun) for that creamy middle layer.
- Chocolate Fudge (store-bought or homemade): For that irresistible gooey layer that ties everything together.
- Magic Shell Topping: The final crunchy chocolate layer that seals the deal on this amazing cake.
How to Make Brownie Ice Cream Cake Recipe
Step 1: Prepare and Bake the Brownie Base
Start by preheating your oven to 350°F (177°C) and prepping a 9-inch springform pan with nonstick spray. A helpful trick is to press parchment paper between the pan parts before spraying to make cake removal easier after freezing. Next, whisk together all your dry ingredients—flour, sugar, cocoa powder, baking soda, and salt. Add the oil, water, and vanilla extract, then stir just until no dry spots remain. Pour this luscious batter into the pan and bake for 15 to 18 minutes, or until a toothpick comes out clean. Let the brownie base cool completely while you prepare the other layers.
Step 2: Spread the First Ice Cream Layer
Once the brownie base has cooled for about 20 minutes, remove one pint of ice cream from the freezer to soften on the counter. Stir it well so it’s smooth and easy to spread. Gently spread this softened ice cream over the brownie base, being careful not to disturb the brownie layer. Freeze the cake uncovered for 20 minutes so this layer firms up nicely while you prepare the next delicious step.
Step 3: Add the Chocolate Fudge Layer
When the first ice cream layer is firm, warm your chocolate fudge slightly if needed so it’s drizzle-friendly. Spoon it generously over the ice cream, creating a thick, gooey layer. Pop the cake back into the freezer for another 20 minutes to set the fudge. Meanwhile, get your second pint of ice cream out to thaw.
Step 4: Finish With the Second Ice Cream Layer
Give the second pint of ice cream a good stir and make sure it’s very soft—this helps create an even, smooth layer. Spread it carefully over the fudge, covering it completely. Now cover the cake and freeze it for at least two hours, or up to a week if you need to prepare in advance.
Step 5: The Final Touch
Before serving, take the ice cream cake out of the freezer for about 10 minutes to make slicing easier. Remove the sides of the springform pan, then drizzle the entire cake with your magic shell topping. It will harden into a beautiful, crackling chocolate layer that adds a perfect finishing crunch. Slice, serve, and enjoy every creamy, chocolaty bite!
How to Serve Brownie Ice Cream Cake Recipe
Garnishes
Keep it simple and stunning with a sprinkle of chopped nuts, fresh berries, or a light dusting of powdered sugar. Whipped cream is always a delightful option, adding an airy contrast to the rich layers. These garnishes don’t just enhance appearance—they add textural complexity and freshness that elevate the entire dessert.
Side Dishes
This Brownie Ice Cream Cake Recipe is usually the star of the show, but if you want to serve it alongside something else, think light and refreshing. A crisp fruit salad or a tangy sorbet can provide a palate-cleansing counterpoint to the dense chocolate and smooth ice cream. Even a few cups of freshly brewed coffee or a glass of cold milk pair beautifully and round out the experience.
Creative Ways to Present
For an extra-special touch, try serving individual slices on colorful plates with a drizzle of caramel or raspberry sauce. You can also create mini versions by baking the brownie in muffin tins and layering ice cream in between for cute, single-serve treats. No matter how you present it, this cake is sure to impress everyone around your table.
Make Ahead and Storage
Storing Leftovers
Because this is an ice cream cake, it’s best stored in the freezer in an airtight container to maintain freshness. Wrapping it tightly with plastic wrap before sealing helps prevent freezer burn and keeps flavors intact. When you’re ready for more, just slice and serve straight from the freezer.
Freezing
This cake actually benefits from freezing since it allows all the layers to meld beautifully. It can be frozen up to one week in advance, making it perfect for planning ahead for parties or special occasions. Just make sure to cover it well so it doesn’t absorb any other freezer odors.
Reheating
Since this is an ice cream cake, reheating isn’t part of the game. Instead, let slices sit at room temperature for about 10 minutes before serving to soften slightly, which helps with easier cutting and enhances the creamy texture.
FAQs
Can I use different flavors of ice cream for this cake?
Absolutely! The Brownie Ice Cream Cake Recipe is incredibly versatile. Vanilla and chocolate are classic, but feel free to experiment with mint chocolate chip, caramel swirl, or even fruity sorbets to customize your cake’s flavor profile.
Do I have to use store-bought fudge and magic shell?
Nope! While store-bought options save time and are convenient, you can make homemade chocolate fudge sauce and magic shell topping for an extra personal touch. Homemade versions allow you to control sweetness and ingredients.
Can I make this cake in advance?
Yes! In fact, this Brownie Ice Cream Cake Recipe is perfect for make-ahead dessert plans. Bake the brownie, layer your ice cream and fudge, and freeze for up to a week. Just add the magic shell topping right before serving for the best texture.
What type of pan should I use?
A 9-inch springform pan is ideal because it lets you easily remove the cake without damaging the layers. The parchment trick ensures smooth removal but isn’t absolutely necessary if you don’t have parchment handy.
Can I substitute the cooking oil with butter?
For the fudgy texture aimed for here, oil works best because it keeps the brownies moist and tender. Butter can be used but may slightly change the texture, making the brownies denser. If you try it, use melted butter for better results.
Final Thoughts
This Brownie Ice Cream Cake Recipe is one of those desserts that feels like a big warm hug and a cool breeze all at once. It’s easy enough to whip up with simple ingredients but delivers a level of indulgence that almost feels luxurious. Whether you’re making it for family gatherings, birthdays, or just a relaxing weekend treat, I promise you’ll fall in love with every decadent layer. Go ahead, give it a try—you’ll be so glad you did!
Print
Brownie Ice Cream Cake Recipe
- Total Time: 3 hours 30 minutes
- Yield: 8 servings 1x
- Diet: Vegetarian
Description
This Brownie Ice Cream Cake is a decadent layered dessert featuring a fudgy brownie base topped with two layers of creamy ice cream separated by rich chocolate fudge. Finished with a drizzle of Magic Shell topping, it’s perfect for celebrations or a special treat on a warm day.
Ingredients
Brownie Base
- 1/2 cup All-Purpose Flour
- 1/2 cup Sugar
- 1/3 cup Unsweetened Cocoa Powder
- 1/2 teaspoon Baking Soda
- Pinch Salt
- 2 Tablespoons Cooking Oil (vegetable, canola, grape seed, or avocado oil)
- 1/2 cup Water
- 1/4 teaspoon Pure Vanilla Extract
Ice Cream Layers
- 2 pints Ice Cream (any flavor, softened)
Toppings
- 1 10-ounce jar Chocolate Fudge, store-bought (or homemade)
- 1/2 cup Magic Shell Topping, store-bought (or homemade)
Instructions
- Preheat Oven: Set your oven to 350°F (177°C) to prepare for baking the brownie base.
- Prepare Pan: Spray a 9-inch springform pan with nonstick spray. For best results, line the bottom with parchment paper pressed between pan parts before closing, then spray again, which helps with easy removal after freezing.
- Make Brownie Batter: In a mixing bowl, whisk together flour, sugar, cocoa powder, baking soda, and salt. Add oil, water, and vanilla extract, stirring until the mixture has no dry spots.
- Bake Brownie Base: Pour the batter into the prepared pan and bake for 15 to 18 minutes until a toothpick inserted in the center comes out clean.
- Cool Brownie: Let the brownie base cool in the pan for about 20 minutes while you let the first pint of ice cream soften on the counter.
- First Ice Cream Layer: Stir the softened ice cream well, then spread it evenly over the brownie base without lifting the brownie.
- Freeze First Layer: Place the cake in the freezer uncovered for 20 minutes to firm the first ice cream layer.
- Add Fudge: Stir the chocolate fudge to soften if needed, then drizzle it over the firm ice cream layer. Freeze for another 20 minutes.
- Second Ice Cream Layer: Soften and stir the second pint of ice cream thoroughly, then spread it evenly over the fudge layer. For best results, ensure it is very soft before spreading.
- Freeze Cake: Cover the cake and freeze until fully set, at least 2 hours and up to a week.
- Prepare for Serving: Remove the cake from the freezer 10 minutes before serving. Release it from the springform pan and drizzle the Magic Shell topping over the top.
- Serve: Slice the cake and enjoy this rich, layered contrast of fudgy brownie, creamy ice cream, and chocolate toppings.
Notes
- For easier cake removal, lining the springform pan with parchment paper helps tremendously.
- Use ice cream flavors of your choice; vanilla or chocolate work best for classic taste.
- You can make your own chocolate fudge and Magic Shell topping if preferred.
- Make sure ice cream is softened before spreading to prevent tearing the brownie base.
- Freezing the assembled cake well ensures clean slices and proper layering.
- Prep Time: 10 minutes
- Cook Time: 18 minutes
- Category: Dessert
- Method: Baking and Freezing
- Cuisine: American
Nutrition
- Serving Size: 1 slice (1/8 of cake)
- Calories: 380 kcal
- Sugar: 30 g
- Sodium: 140 mg
- Fat: 20 g
- Saturated Fat: 9 g
- Unsaturated Fat: 8 g
- Trans Fat: 0.2 g
- Carbohydrates: 44 g
- Fiber: 3 g
- Protein: 5 g
- Cholesterol: 35 mg
Keywords: brownie ice cream cake, layered dessert, chocolate fudge cake, frozen dessert, ice cream cake recipe
