Description
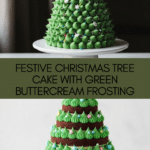
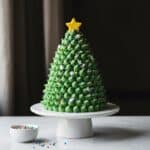
This festive Christmas Tree Cake is a showstopper dessert perfect for holiday celebrations. Featuring layers of rich chocolate cake stacked in decreasing sizes to form a tree shape, it is frosted with creamy homemade buttercream dyed in varying shades of green to mimic pine needles. Decorated with colorful sprinkles as ornaments, this impressive cake combines classic flavors with beautiful presentation, making it ideal for sharing with family and friends during the holidays.
Ingredients
Scale
Cake Layers
- Cooking spray, for greasing pans
- 2 (15.25-oz.) boxes chocolate cake mix, plus ingredients called for on box (typically eggs, water, and oil)
Buttercream Frosting
- 2 1/2 cups (5 sticks) unsalted butter, softened
- 8 cups powdered sugar
- 2 tablespoons heavy cream, plus more as needed
- 1 tablespoon pure vanilla extract
- 1/4 teaspoon kosher salt
- Green food coloring (light green, medium green, dark green shades)
- Sprinkles, for decoration
Instructions
- Preheat and Prepare Pans: Preheat your oven to 350°F. Grease and line five 8-inch round cake pans with parchment paper to prevent sticking.
- Make and Bake Cake Layers: Prepare cake mixes according to the package instructions. Evenly distribute the batter among the prepared pans. Bake for 20 to 23 minutes, or until a toothpick inserted in the center comes out clean. Allow cakes to cool for 15 minutes in pans, then invert onto cooling racks to cool completely.
- Freeze Cake Layers: Once cooled, wrap each cake layer tightly in plastic wrap and freeze for at least 30 minutes, up to 3 days. This step aids in easier slicing and assembly.
- Prepare Buttercream Frosting: In a large bowl or stand mixer fitted with the paddle attachment, beat softened butter until smooth and lump-free. Gradually add powdered sugar and beat on low until incorporated and smooth. Mix in heavy cream, vanilla extract, and salt, beating until combined. Add additional cream by tablespoon if needed to reach a smooth, spreadable consistency.
- Level the Cake Layers: One at a time, use a long serrated knife to level the tops of the frozen cake layers for even stacking.
- Cut and Stack Large Cake Layers: Using a 7-inch round cutter, cut a circle from one cake layer and place it on your serving plate or cake stand. Spread a thin layer of frosting on top. Repeat this process with progressively smaller round cutters of 6-inch, 5-inch, and 4-inch sizes on subsequent cake layers, frosting between each.
- Create the Tree Top Layers: From the fifth cake layer, cut out circles measuring 3 inches, 2 1/2 inches, 2 inches, 1 1/2 inches, and 1 inch. Stack these small circles on top of the cake with frosting between each to form the tree’s pointed tip.
- Crumb Coat and Chill: Place approximately one-third of the remaining frosting into a piping bag fitted with a large round tip. Pipe frosting all around the assembled cake to cover completely. Use an offset spatula to smooth and shape the frosting into a cone resembling a tree. Refrigerate the cake for 30 minutes to set the crumb coat and stabilize the structure.
- Divide and Color Frosting: Divide the leftover frosting evenly into three bowls. Tint one bowl light green, one medium green, and one dark green using food coloring.
- Prepare Multi-Shade Piping Bag: Using a piping bag fitted with an open star tip, spoon the different shades of green frosting side by side into the bag, placing light green on one side, medium green on the second, and dark green on the third side for a variegated effect.
- Pipe Decorative Frosting: Beginning at the base of the cake, pipe clusters of frosting, pulling away from the cake slightly as you release to mimic pine needles. Rotate the piping bag periodically to alternate the green shades for a natural look.
- Add Sprinkles: Finally, decorate the frosted cake with colorful sprinkles to imitate Christmas tree ornaments, enhancing the festive appearance.
Notes
- Freezing the cake layers before assembly makes cutting and stacking much easier and helps maintain the cake’s shape.
- You can customize the sprinkles to match your holiday décor or use edible glitter for extra sparkle.
- Store the finished cake refrigerated and allow it to come to room temperature before serving for best flavor and texture.
- For a moist cake, avoid overbaking; start checking for doneness a few minutes before the suggested baking time.
- If you don’t have round cutters, carefully trim cake layers into decreasing sizes using a serrated knife and a template.
- Prep Time: 30 minutes
- Cook Time: 22 minutes
- Category: Dessert
- Method: Baking
- Cuisine: American
Keywords: Christmas cake, holiday dessert, chocolate cake, buttercream frosting, layered cake, festive cake, holiday baking