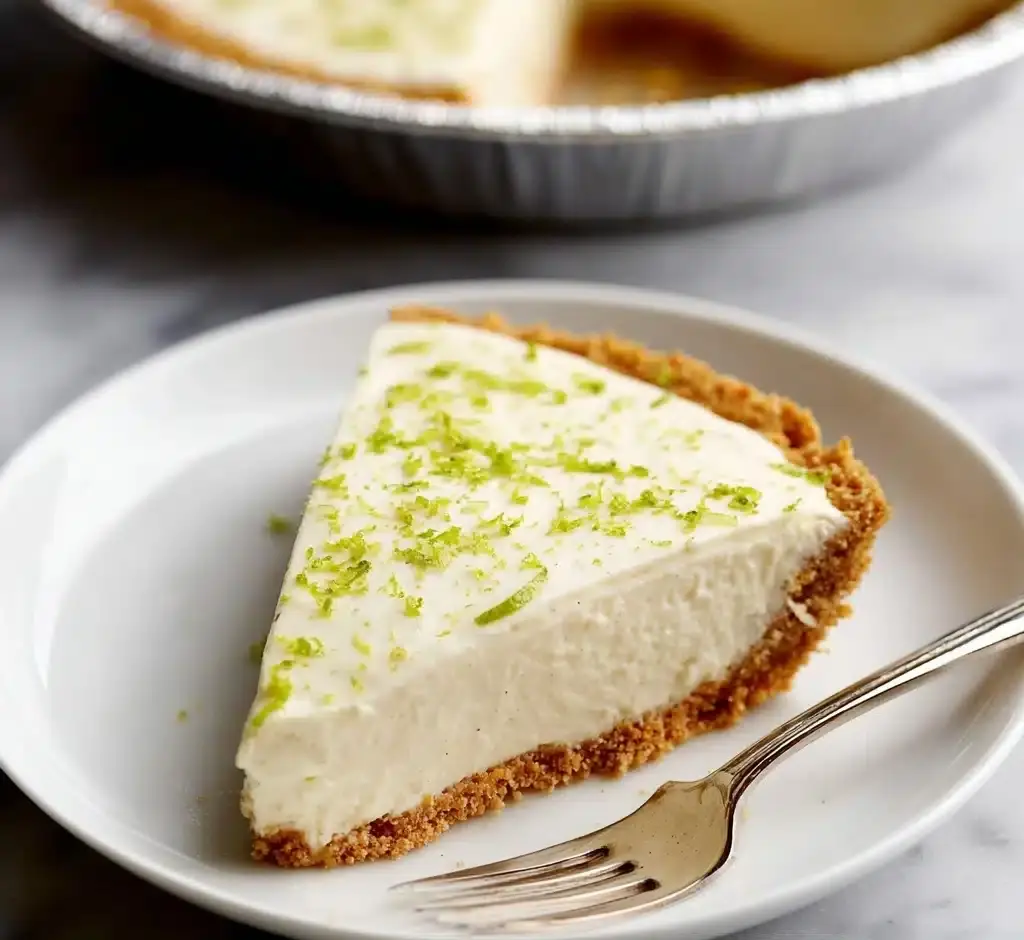
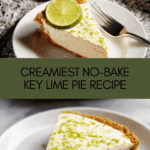
Easy Key Lime Pie (no bake) Recipe
If you’re longing for a slice of summer no matter the season, Easy Key Lime Pie (no bake) is the answer you’ve been searching for. This recipe offers the creamy tang of classic key lime pie, but comes together in minutes — no oven required! It’s the ultimate dessert for impromptu gatherings, backyard barbecues, or simply treating yourself after a long day. Zippy lime and silky cream cheese meld into a luscious filling, all nestled in a buttery graham cracker crust. With just a few basic ingredients and simple steps, you’ll have a showstopping, zesty treat that’s sure to become your go-to sweet.

Ingredients You’ll Need
Each ingredient in this Easy Key Lime Pie (no bake) plays a vital role, balancing creamy richness and citrusy zing for that unmistakable tropical flavor. Keeping it simple lets every element shine, and makes prep a breeze!
- Cream cheese (16 ounces, softened): Gives the filling a silky-smooth texture and gorgeous tang—make sure it’s fully softened for a lump-free pie.
- Sweetened condensed milk (14 ounces, 1 can): Adds plenty of sweetness and helps the pie set up without baking.
- Lime juice (1/3 cup, from 2 large limes): The essential ingredient for bright, bold flavor; fresh-squeezed makes a difference!
- Zest of 1 lime (divided): Infuses the filling with aromatic citrus oils and provides a pop of color for garnish.
- Graham cracker crust (10-inch, store-bought): Buttery and crisp, it saves you time and holds the creamy filling perfectly.
How to Make Easy Key Lime Pie (no bake)
Step 1: Blend the Filling
Start by placing your softened cream cheese, sweetened condensed milk, fresh lime juice, and about two-thirds of the lime zest into a large mixing bowl. With a hand mixer or stand mixer, beat everything together on high for around four minutes, until it’s dreamy, silky-smooth, and absolutely lump-free. This step is where the magic starts and where that irresistible tangy kick forms.
Step 2: Fill the Crust
Take your trusty graham cracker crust, and pour the creamy lime filling right in. Use a spatula to spread it evenly, making sure the filling gets right to the edges for perfect slices later. This step is delightfully simple and lets that luscious filling take center stage.
Step 3: Add Zest and Chill
Sprinkle the remaining lime zest over the top of the pie to add a gorgeous pop of color and that extra lime-scented aroma you’ll love. Refrigerate the pie for at least 3 to 4 hours, or until the filling is set and perfectly sliceable. Patience pays off here—chilling allows the flavors to meld and the texture to firm up beautifully.
Step 4: Serve and Enjoy
When you’re ready to serve, make sure the pie is well-chilled and add extra lime slices, if you like, for an extra flourish. Serve it straight from the fridge and watch faces light up at that first bite of cool, zesty delight! Easy Key Lime Pie (no bake) is always best served cold.
How to Serve Easy Key Lime Pie (no bake)
Garnishes
Even the simplest touch can make this pie look absolutely stunning! A few extra lime slices or twists lend an elegant look, while a whipped cream dollop adds lightness to every slice. Sprinkle any leftover lime zest right before serving to keep its bright green color as fresh and lively as the flavor.
Side Dishes
This Easy Key Lime Pie (no bake) pairs beautifully with tropical fruit salads—think pineapple, mango, or juicy strawberries for a burst of sweetness alongside the citrusy tang. A refreshing mint or basil iced tea is the perfect beverage to round out your dessert spread!
Creative Ways to Present
Serve mini pies in individual jars for a playful picnic or dinner party, or layer the filling and crust in parfait glasses for a quick and eye-catching dessert. You can even make a pie “board” with extra toppings (berries, coconut flakes, whipped cream) so everyone can customize their slice just the way they like it.
Make Ahead and Storage
Storing Leftovers
Cover any leftover Easy Key Lime Pie (no bake) tightly with plastic wrap or foil, or transfer individual slices to airtight containers. Stored in the fridge, the pie will stay fresh and delicious for up to 4 days—if it lasts that long!
Freezing
This pie freezes like a dream! Wrap it well or store slices in freezer-safe containers. When you’re ready for a slice, just thaw in the refrigerator overnight, and it’ll taste just as creamy and rich as the day it was made.
Reheating
No reheating required for Easy Key Lime Pie (no bake)! Just thaw chilled or frozen slices in the fridge until fully softened, and serve cold for the best taste and texture every time.
FAQs
Can I use bottled lime juice instead of fresh limes?
Fresh lime juice gives you the brightest, most vibrant flavor, but in a pinch, bottled juice works too. Just look for high-quality juice without added sugars for the best results in your Easy Key Lime Pie (no bake).
Can I make Easy Key Lime Pie (no bake) ahead of time?
Absolutely! In fact, it tastes even better after chilling in the fridge overnight. It’s the perfect dessert to prepare a day before your gathering—just wait to add garnishes until just before serving.
What if I don’t have a stand mixer?
No worries at all! A hand mixer works great, or you can mix by hand with a sturdy whisk and some elbow grease. The goal is to get the filling as creamy and lump-free as possible.
Is it possible to make this recipe gluten free?
Definitely! Simply purchase a gluten-free graham cracker crust or make your own with gluten-free graham crackers so everyone can enjoy this Easy Key Lime Pie (no bake) worry-free.
Can I use lemon instead of lime?
Sure! While lime gives a distinct tart and aromatic citrus kick, lemon will still make a beautifully tangy pie. For the classic Easy Key Lime Pie (no bake) experience, stick with lime if you can—but feel free to get creative!
Final Thoughts
This Easy Key Lime Pie (no bake) brings together cheerful citrus flavor, creamy coolness, and pure ease in every bite. Whether you’re a beginner or a seasoned baker, this pie guarantees smiles, seconds, and happy memories. Give it a try, and you’ll soon see why it’s a treasured favorite—no oven needed!
Print
Easy Key Lime Pie (no bake) Recipe
- Total Time: 3-4 hours
- Yield: 1 10-inch pie 1x
- Diet: Vegetarian
Description
This no-bake Easy Key Lime Pie is a creamy and tangy dessert that’s perfect for any occasion. With just a few simple ingredients, you can whip up this delicious pie in no time.
Ingredients
Cream Cheese Mixture:
- 16 ounces cream cheese (2 8-ounce blocks, softened)
- 14 ounces sweetened condensed milk (1 can)
- 1/3 cup lime juice (about 2 large limes)
- Zest of 1 lime (divided, reserve 1/3 for garnish)
Crust:
- 1 graham cracker crust (10-inch, store bought)
Instructions
- Cream Cheese Mixture: In a large mixing bowl, combine softened cream cheese, sweetened condensed milk, lime juice, and 2/3 of the lime zest. Beat on high speed until smooth and creamy, about 4 minutes.
- Assemble: Transfer the mixture into the graham cracker crust.
- Garnish: Sprinkle the reserved lime zest on top of the pie.
- Chill: Refrigerate the pie until the filling is set, approximately 3 to 4 hours.
- Serve: Serve the pie chilled, and garnish with extra lime slices if desired.
- Prep Time: 15 minutes
- Cook Time: 0 minutes
- Category: Dessert
- Method: No-Bake
- Cuisine: American
Nutrition
- Serving Size: 1 slice
- Calories: 320
- Sugar: 24g
- Sodium: 230mg
- Fat: 20g
- Saturated Fat: 12g
- Unsaturated Fat: 6g
- Trans Fat: 0g
- Carbohydrates: 30g
- Fiber: 0g
- Protein: 6g
- Cholesterol: 65mg
Keywords: Key Lime Pie, No-Bake, Dessert, Creamy, Tangy


