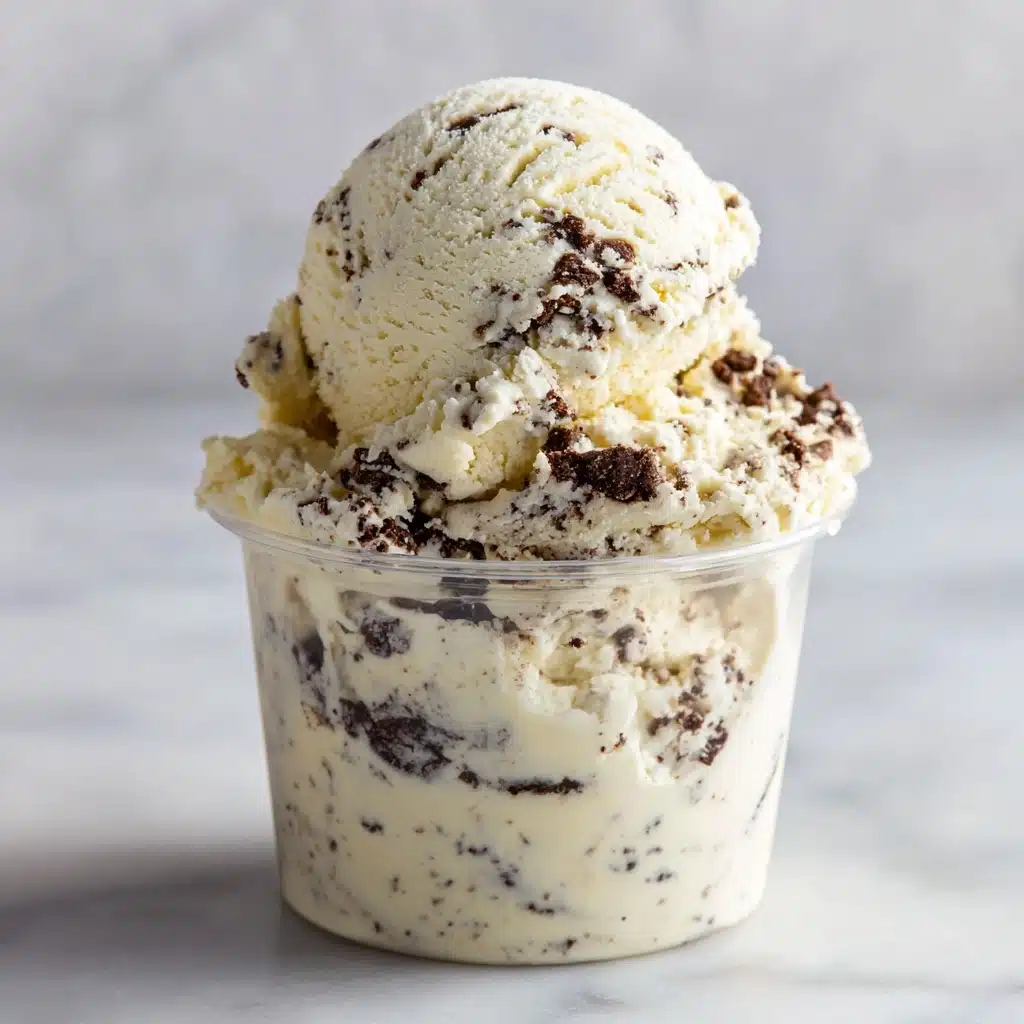
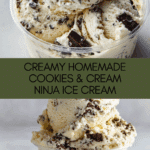
Easy Ninja Creami Cookies and Cream Recipe
If you’re searching for the ultimate homemade cookies and cream treat that’s creamy, dreamy, and wildly simple to make, let me introduce you to Easy Ninja Creami Cookies and Cream. With a handful of basic ingredients and a little bit of patience, you can transform everyday staples into the kind of decadent, scoopable dessert that tastes like pure nostalgia. Whether you’re a proud owner of a Ninja Creami or considering taking the plunge, this recipe will show you just how delightful and rewarding homemade ice cream can be—from the comforting vanilla base to the decadent pockets of Oreo pieces in every bite.

Ingredients You’ll Need
I love that Easy Ninja Creami Cookies and Cream relies on such familiar, everyday ingredients—each one brings something irreplaceable to the party! Simple as it may be, every component matters for achieving that classic cookies and cream flavor, lush texture, and those beautiful Oreo cookie swirls.
- Cream Cheese: Adds welcome tang and helps create the ultra-creamy mouthfeel we crave in premium ice cream.
- Granulated Sugar: Sweetens our base and balances the slight tang from the cream cheese for harmonious flavor.
- Vanilla Essence: Rounds out the flavors, lending warmth and complexity to our ice cream base.
- Whipping Cream: Provides richness and ensures that perfect, scoopable texture—don’t skimp here!
- Milk: Lightens the cream and prevents the ice cream from becoming overly dense.
- Chocolate Sandwich Cookies (Oreos): The shining stars—these bring signature crunch and that irresistible cookies-and-cream vibe.
How to Make Easy Ninja Creami Cookies and Cream
Step 1: Prepare the Vanilla Base
Start by softening the cream cheese—just a quick ten seconds in the microwave transforms it into a smooth blank slate ready to pull flavors together. Add your sugar and vanilla straight in with the cream cheese, and use a whisk or spatula to blend everything into a silky, glossy mixture. The smoother this base, the creamier your final ice cream will be—so take your time here for best results.
Step 2: Incorporate Dairy Ingredients
Next, pour in your cold whipping cream and milk. Switch back to your whisk, and blend until the mixture is completely uniform and free of any lumps. This step combines all that luscious creaminess with the sweet, tangy base, creating the foundation of our Easy Ninja Creami Cookies and Cream. Once everything is smooth and creamy, pour the mixture into your Ninja Creami container but be careful not to exceed the fill line!
Step 3: Freeze the Mixture
Pop your filled Ninja Creami tub in the freezer. Find a spot that’s level—this matters, because an even freeze means smoother churning later. Leave it to freeze for at least 24 hours (I know, the anticipation is real!), but your patience will be rewarded with a perfectly solid base that transforms into gorgeous, creamy ice cream.
Step 4: Process the Ice Cream
When your mixture is thoroughly frozen, it’s time for the magic! Place the tub into your Ninja Creami and run the ICE CREAM setting. This spins, aerates, and churns the solid block into creamy, dreamy scoops of vanilla goodness. The transformation is kind of miraculous—don’t be afraid to peek inside as it works!
Step 5: Prepare the Oreos and Mix In
While your ice cream is spinning, roughly chop those Oreos: quarter them for chunks that hold their shape but still blend easily. When the ice cream is ready, make a small well in its center and pile in your Oreo pieces. Use the MIX IN function on the Creami to swirl those iconic cookie bits through every inch of your ice cream—it’s what makes this Easy Ninja Creami Cookies and Cream so fun to eat!
Step 6: Serve or Store
Once the Oreos are thoroughly incorporated, you have two glorious options: dig in right away for a fresh and incredibly creamy treat, or transfer your ice cream to an airtight container and freeze for later. Either way, you’ll keep that signature cookies-and-cream texture and flavor that tastes just as good the next day.
How to Serve Easy Ninja Creami Cookies and Cream
Garnishes
Go the extra mile and sprinkle extra crushed Oreos, drizzle with chocolate syrup, or even add whipped cream on top. These little flourishes don’t just look impressive—they add extra crunch and decadence to every spoonful of Easy Ninja Creami Cookies and Cream.
Side Dishes
This ice cream pairs incredibly well with warm, gooey brownies, classic chocolate chip cookies, or even a slice of vanilla pound cake. The combination of chilled, cookies-studded ice cream with a warm dessert is pure bliss—trust me, it’s a game-changer for casual get-togethers or late-night treats.
Creative Ways to Present
Try serving Easy Ninja Creami Cookies and Cream in waffle cones, layered into parfaits with more crumbled cookies, or sandwiched between two chewy chocolate cookies for an ice cream sandwich twist. Kids and adults alike love discovering new ways to dig into this playful, indulgent dessert.
Make Ahead and Storage
Storing Leftovers
If you have leftovers (rare, but it happens!), be sure to transfer your Easy Ninja Creami Cookies and Cream to an airtight container. Keep it in the coldest part of your freezer—the tight seal keeps it from picking up those pesky freezer odors and maintains its creamy texture.
Freezing
Homemade ice cream freezes beautifully as long as it is stored properly. For the very best texture, press a piece of parchment paper or wax paper directly onto the surface before sealing your container; this small step stops ice crystals from forming and keeps every spoonful as smooth as the day you made it.
Reheating
Okay, we won’t actually “reheat” ice cream, but if your Easy Ninja Creami Cookies and Cream is too hard straight from the freezer, let it sit at room temperature for 5 to 10 minutes. This mellow patience leads straight back to that creamy, dreamy texture you love—no microwave needed.
FAQs
Can I use low-fat milk or cream?
You technically can, but the result will be less rich and creamy. For classic Easy Ninja Creami Cookies and Cream, stick with full-fat ingredients for that luscious, scoopable texture.
Do I have to use Oreos, or can I try other cookies?
Absolutely—experiment with different chocolate sandwich cookies, or try something totally different like chocolate chips or crushed graham crackers. Just keep the cookie pieces a similar size for even mixing with the Creami.
My ice cream is icy. What did I do wrong?
Usually this happens if the mixture wasn’t whisked well enough before freezing, or if the base didn’t freeze for at least 24 hours. Make sure your base is super smooth, and give it plenty of time to freeze solid.
Can I double the recipe?
Most Ninja Creami containers are designed for a specific fill-line, so it’s safest to make separate batches as needed. That said, the recipe is easy enough to repeat as often as you’d like!
How long will Easy Ninja Creami Cookies and Cream keep in the freezer?
Stored in an airtight container, your ice cream should stay fresh and fabulous for up to two weeks. For peak texture and flavor, enjoy it within the first several days.
Final Thoughts
If you’ve ever dreamed of a homemade dessert that’s easy, nostalgic, and guaranteed to make everyone smile, Easy Ninja Creami Cookies and Cream is that recipe. I hope you’ll give it a try soon and experience just how rewarding (and delicious) a scoop of homemade cookies and cream ice cream can be. Happy churning!
Print
Easy Ninja Creami Cookies and Cream Recipe
- Total Time: 24 hours 15 minutes
- Yield: 4 servings 1x
- Diet: Vegetarian
Description
Indulge in the creamy goodness of homemade Cookies and Cream ice cream with this easy Ninja Creami recipe. With just a few simple ingredients and the magic of the Ninja Creami machine, you can create a delicious frozen treat that everyone will love.
Ingredients
Vanilla Base
- 1 tablespoon cream cheese (about 1/2 ounce)
- 1/3 cup granulated sugar
- 1 teaspoon vanilla essence
- 3/4 cup whipping cream
- 1 cup milk
Oreos Mix-In
- 5 chocolate sandwich cookies (such as Oreos)
Instructions
- Step 1: Prepare the Vanilla Base – Add cream cheese to a large microwave-safe bowl and microwave for 10 seconds to soften it. Once softened, add sugar and vanilla to the cream cheese. Mix until smooth.
- Step 2: Incorporate Dairy Ingredients – Pour in the heavy cream and milk, whisk until well-blended. Transfer to Ninja Creami container, avoiding overfilling.
- Step 3: Freeze the Mixture – Place container in the freezer for at least 24 hours until solidified.
- Step 4: Process the Ice Cream – Process in Ninja Creami on ICE CREAM setting to churn and aerate.
- Step 5: Prepare the Oreos and Mix In – Cut Oreos into pieces, mix into ice cream using MIX IN feature.
- Step 6: Serve or Store – Enjoy immediately or store in airtight container in the freezer.
- Prep Time: 15 minutes
- Category: Dessert
- Method: Freezing, Churning
- Cuisine: American
Nutrition
- Serving Size: 1 serving
- Calories: 320
- Sugar: 22g
- Sodium: 150mg
- Fat: 24g
- Saturated Fat: 13g
- Unsaturated Fat: 9g
- Trans Fat: 0g
- Carbohydrates: 26g
- Fiber: 0g
- Protein: 3g
- Cholesterol: 75mg
Keywords: Ninja Creami, Cookies and Cream, Homemade Ice Cream

