Homemade Coffee Whipped Cream Recipe
If you’re looking for a simple-but-stunning way to elevate your desserts, look no further than this Homemade Coffee Whipped Cream Recipe. Imagine the billowy richness of sweetened whipped cream, kissed with the bold, cozy notes of espresso — it’s the kind of topping that turns even the most ordinary desserts into showstoppers. Whether dolloped on cakes, spooned into hot drinks, or enjoyed straight from the bowl, this is the treat coffee lovers dream about. Let’s dive into how easy it is to make a cloud of flavorful, coffee-infused whipped cream right at home!

Ingredients You’ll Need
With just three truly essential ingredients, the Homemade Coffee Whipped Cream Recipe proves that simplicity can pack incredible flavor. Each component plays a starring role: the cream creates dreamy texture, the sugar adds gentle sweetness, and the espresso powder infuses a rich coffee aroma that tastes both sophisticated and familiar.
- Heavy cream (or heavy whipping cream): This is your base, providing all the volume and luscious, creamy texture you want in a whipped topping. Make sure it’s cold for the best results!
- Sugar: Just a tablespoon sweetens the cream perfectly; use superfine granulated sugar if you want a super-smooth finish, but regular works just fine.
- Instant espresso powder: This is the shortcut to rich, intense coffee flavor infused directly into the cream. Don’t substitute regular ground coffee — only instant espresso will fully dissolve.
How to Make Homemade Coffee Whipped Cream Recipe
Step 1: Combine Ingredients
Start by pouring the chilled heavy cream, sugar, and instant espresso powder into the bowl of your stand mixer. If you’re using a hand mixer, any deep mixing bowl works great. This is where the magic begins — the espresso powder blooms in the cream, releasing its wonderful aroma immediately.
Step 2: Begin Whipping
Set your mixer to medium speed (that’s speeds 4 or 5 on a KitchenAid, or 2 or 3 with a handheld mixer). In the first couple of minutes, you’ll notice the mixture turning foamy and bubbly. Keep going! You’ll see it begin to thicken right before your eyes.
Step 3: Increase the Speed
When your cream starts to hold its shape and the whisk leaves clear trails, bump up the mixer to medium-high (speed 7 or 8 on a KitchenAid, or 4 or 5 with a handheld). Now, beat for just 30 seconds to 1 minute. You’re looking for those classic “billowy” whipped cream peaks — fluffy and light, with plenty of movement.
Step 4: Check for Stiff Peaks
Time to test it! Stop the mixer and pull out the whisk attachment. If the whipped cream forms stable peaks that don’t flop over, you’ve nailed it. If it’s still droopy, give it another quick 10–15 second whip, checking frequently. Don’t over-beat; just aim for peaks that stand proud when you lift the whisk.
Step 5: Enjoy or Store
Your homemade coffee whipped cream is now ready to use. Dollop it liberally on cupcakes, pie, or even a steaming mug of hot cocoa. If you’re saving it for later, transfer it to a container and cover tightly — it stays fresh and fluffy for up to two days in the fridge.
How to Serve Homemade Coffee Whipped Cream Recipe
Garnishes
One of my favorite parts about this whipped cream is embellishing it with playful garnishes. Shave a little dark chocolate on top, sprinkle with cocoa powder, or finish with crunchy coffee beans for a sophisticated look. It’s the little touches that make every serving feel extra-special!
Side Dishes
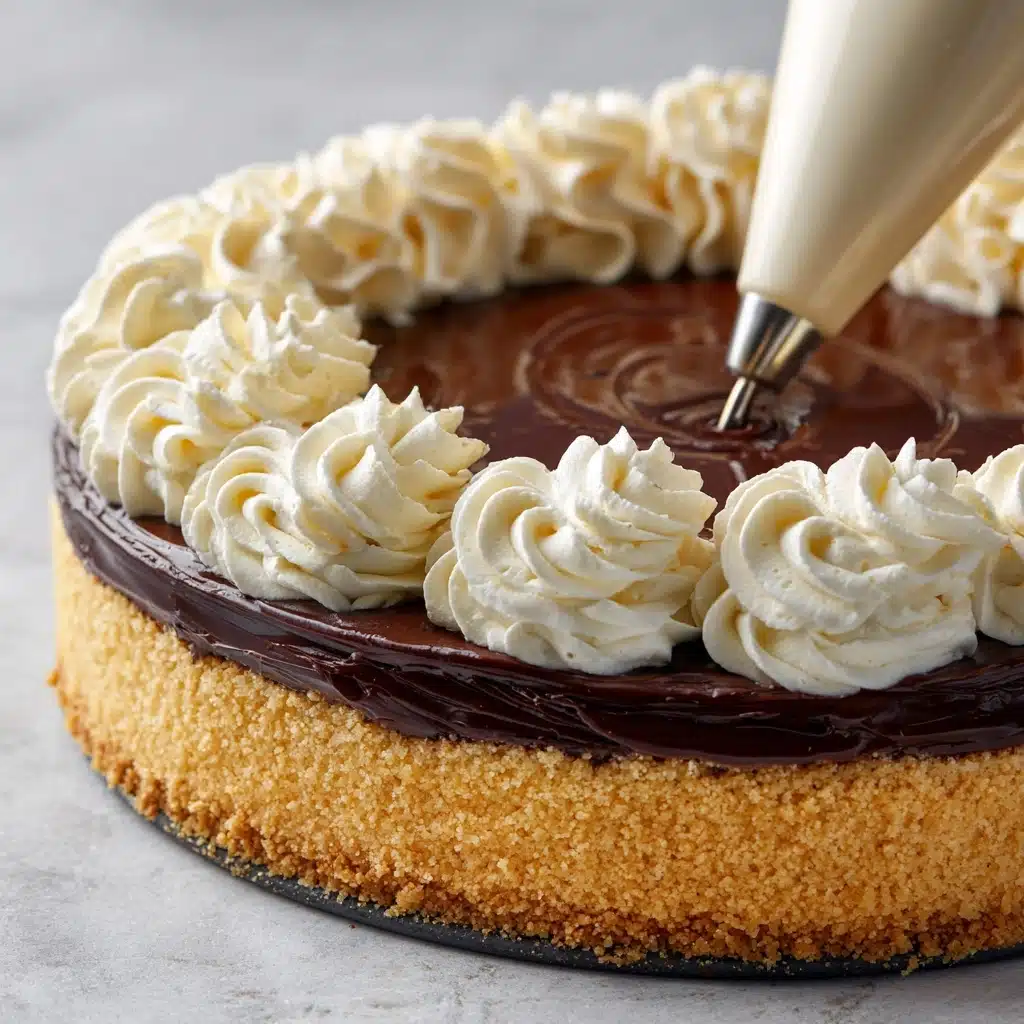
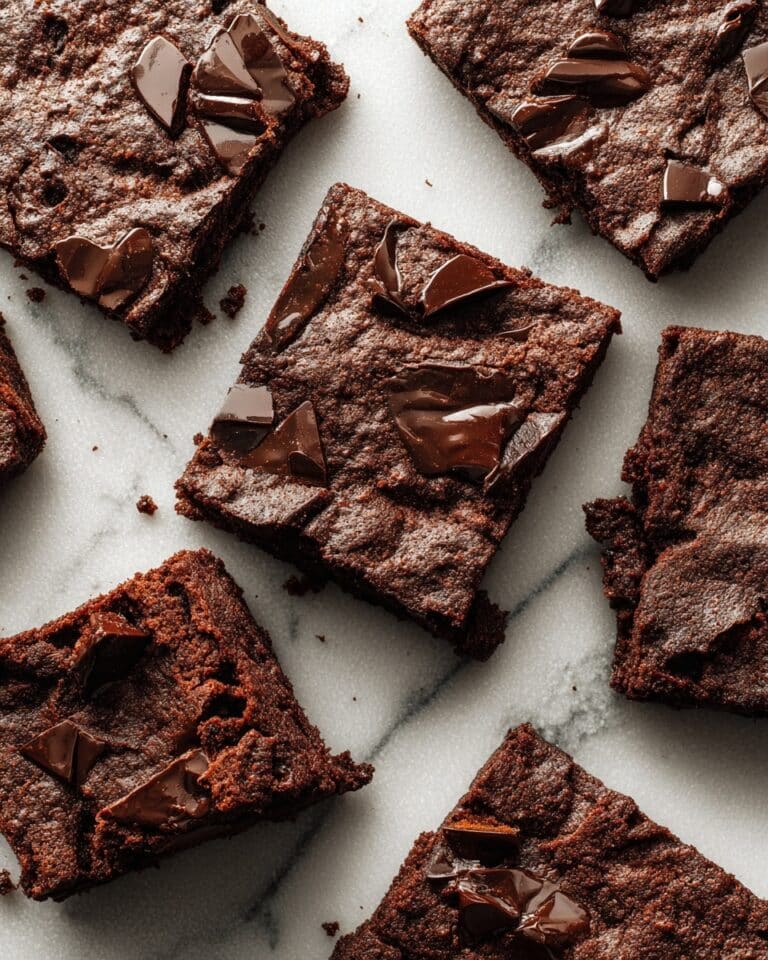
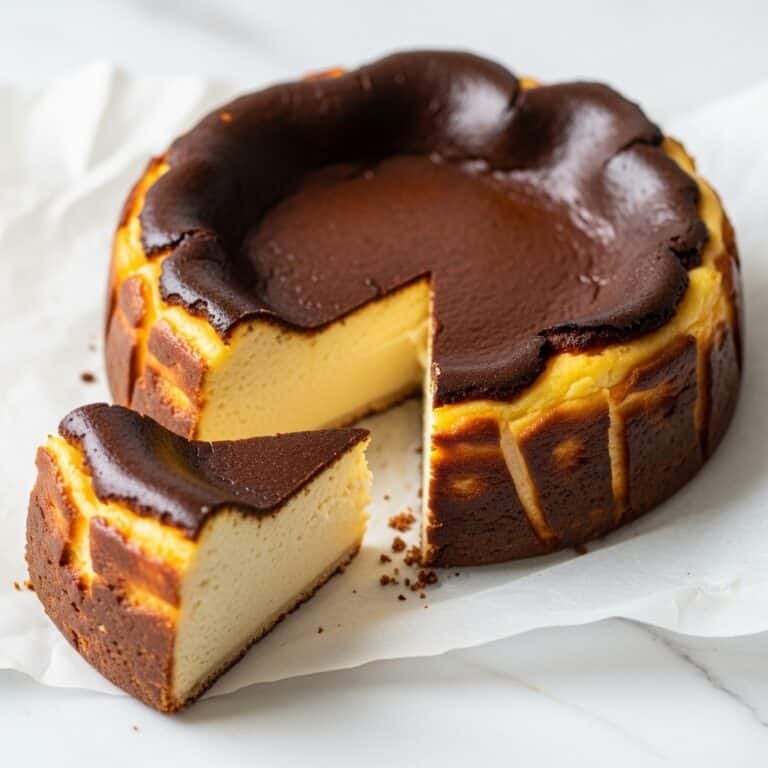
The Homemade Coffee Whipped Cream Recipe is a dream on top of classic desserts like brownies, tiramisu, or cheesecake, but don’t stop there. It’s also magical served alongside breakfast pastries, fruit salad, or sandwiched between cookies for a delightfully grown-up twist.
Creative Ways to Present
For special occasions, pipe your whipped cream in swirly heights onto cakes, fill small glasses with layers of cream and fruit, or even use it to top affogatos (a shot of espresso poured over ice cream). Each of these presentations takes just a little effort but makes a big impression!
Make Ahead and Storage
Storing Leftovers
If you’ve got a bit left over from your Homemade Coffee Whipped Cream Recipe, simply transfer it to an airtight container and keep it in the refrigerator. It holds up well for up to 2 days — just give it a gentle stir before using to revive its fluffy texture.
Freezing
Yes, you can freeze your whipped cream! Scoop dollops onto a parchment-lined baking sheet and freeze solid, then transfer to a freezer bag. Instant mini treats for coffee or hot chocolate, or a quick dessert garnish whenever inspiration strikes. Thaw in the fridge before serving for best results.
Reheating
Technically, you don’t need to reheat whipped cream, but if it stiffens up in the fridge you can gently re-whip it for a few seconds to bring back the airy texture. Just avoid using heat, as it will melt the cream and change its structure.
FAQs
Can I make the Homemade Coffee Whipped Cream Recipe without a mixer?
Absolutely! You can whip the cream by hand with a sturdy whisk and a bit of elbow grease. Use a chilled metal bowl and whisk for faster results. It’s a bit of a workout, but totally doable and incredibly satisfying!
Is it okay to use regular ground coffee instead of instant espresso powder?
For this recipe, stick to instant espresso powder. Ground coffee won’t fully dissolve in the cream and can leave a gritty texture, while the instant espresso melts right in for smooth coffee flavor throughout.
Can I adjust the sweetness of the whipped cream?
Definitely! If you prefer a less sweet topping, use half the sugar, or for a dessert-worthy treat, add an extra teaspoon. Taste as you go, since a little sugar goes a long way in bringing out the espresso flavor.
How do I know if I’ve over-whipped my cream?
If your whipped cream starts to look grainy or clumpy, it’s over-whipped (you’re on your way to butter!). Stop immediately at stiff peaks for the silkiest results. If it gets thick, try gently folding in a tablespoon or two more cream to smooth it out.
Can I use flavored instant coffee instead of espresso powder?
Yes, flavored instant coffee will add a fun twist — try vanilla or caramel for new dimensions. Just remember the flavor won’t be quite as rich or bold as with pure instant espresso powder, but it’ll still be delicious!
Final Thoughts
It’s hard to beat the charm and flavor of this Homemade Coffee Whipped Cream Recipe. I hope you try it the next time you want to make an everyday dessert feel extra special. Trust me, one spoonful and you’ll be dreaming up all sorts of ways to use it!
Print
Homemade Coffee Whipped Cream Recipe
- Total Time: 10 minutes
- Yield: 1 cup of whipped cream 1x
- Diet: Vegetarian
Description
Indulge in the rich and creamy goodness of homemade coffee whipped cream with this easy recipe. Perfect for topping off your favorite desserts or drinks!
Ingredients
Ingredients:
- 1 cup (240mL) heavy cream (or heavy whipping cream)
- 1 Tablespoon (8g or 13g) sugar
- 1 teaspoon (6g) instant espresso powder
Instructions
- Pour the Ingredients: Pour the heavy whipping cream, sugar, and espresso powder into the bowl of a stand mixer fitted with the whisk attachment.
- Whip the Cream: Turn the mixer to medium speed until frothy, then increase to medium-high until stiff peaks form.
- Check Consistency: Ensure the whipped cream holds stiff peaks for optimal texture.
- Serve: Use immediately or store in the refrigerator for up to 2 days.
Notes
Notes:
- For freezing, place dollops of whipped cream on a parchment-lined baking sheet and freeze until solid. Transfer the frozen dollops to a resealable bag for easy storage.
- Prep Time: 5 minutes
- Cook Time: 5 minutes
- Category: Dessert
- Method: Mixing
- Cuisine: Global
Nutrition
- Serving Size: 1 tablespoon
- Calories: 50
- Sugar: 1g
- Sodium: 10mg
- Fat: 5g
- Saturated Fat: 3g
- Unsaturated Fat: 2g
- Trans Fat: 0g
- Carbohydrates: 1g
- Fiber: 0g
- Protein: 0g
- Cholesterol: 20mg
Keywords: whipped cream, coffee, dessert, topping, homemade


