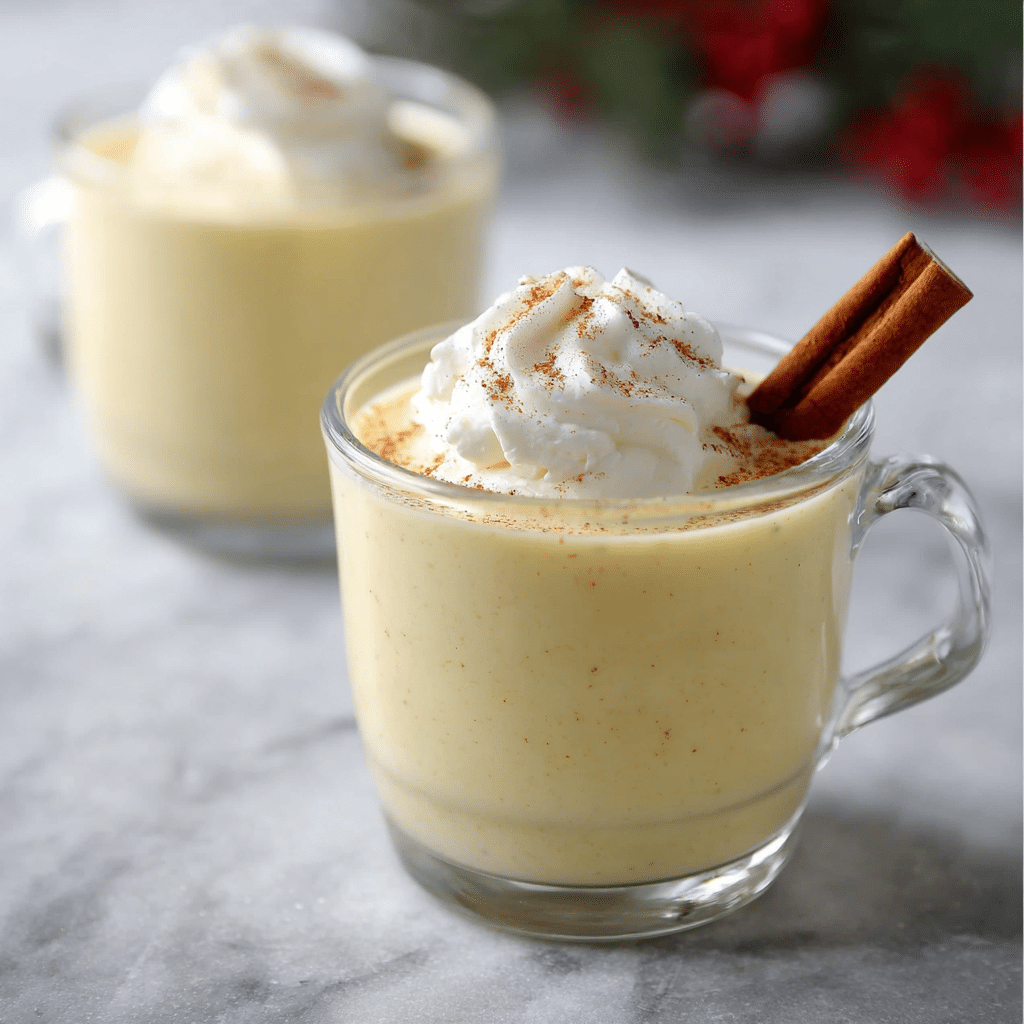
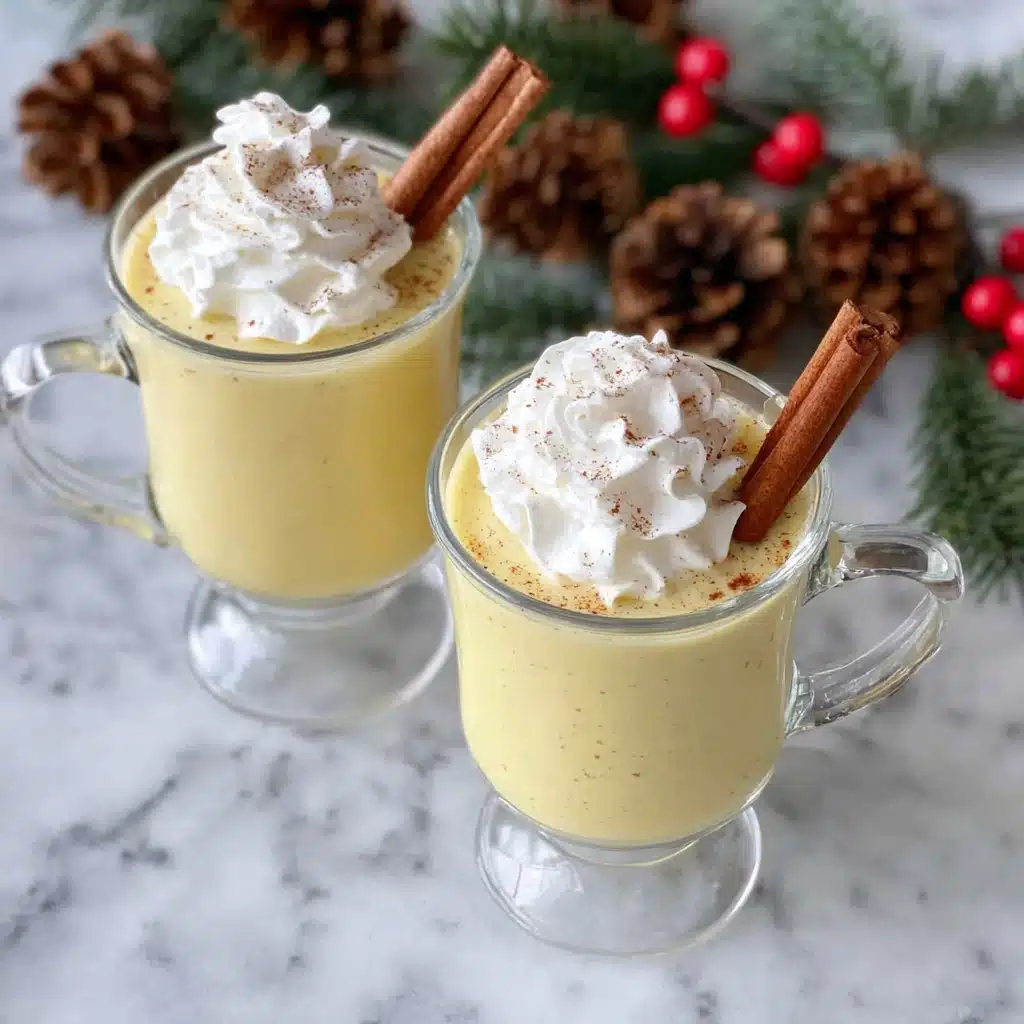
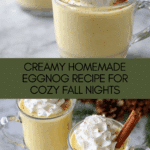
Homemade Eggnog Recipe
If you’re searching for a cozy, creamy drink that embodies the spirit of the holidays and brings a touch of warmth to any gathering, look no further than Homemade Eggnog. This timeless classic combines rich egg yolks, velvety cream, and just the right hint of nutmeg and vanilla, creating a luscious treat that feels both indulgent and comforting. Whether you prefer it with a splash of your favorite spirit or purely for its sweet, spiced charm, this Homemade Eggnog recipe is a celebration in every sip, perfect for sharing with friends and family all season long.
Ingredients You’ll Need
Making Homemade Eggnog is surprisingly simple, relying on a handful of essential ingredients that each play a crucial role in building its signature flavor and silky texture. From the richness of egg yolks to the warmth of freshly ground nutmeg, every element matters.
- 6 large egg yolks: These provide the creamy body and luxurious texture that define classic eggnog.
- 1/2 cup granulated sugar: Balances the richness with just the right amount of sweetness.
- 1 cup heavy whipping cream: Adds decadence and smoothness to the final drink.
- 2 cups milk: Lightens the mixture for a perfect pourable consistency.
- 1/2 teaspoon ground nutmeg: Offers that warm, spiced aroma that’s essential to eggnog’s character.
- Pinch of salt: Enhances all the flavors and rounds out the sweetness.
- 1/4 teaspoon vanilla extract: Adds a subtle depth of flavor and sweetness.
- Ground cinnamon (for topping): The final touch for visual appeal and extra spice flair.
- Alcohol (optional): Adds festive warmth if you want to spike your eggnog, typically rum, bourbon, or brandy work beautifully.
How to Make Homemade Eggnog
Step 1: Whisk the Egg Yolks and Sugar
Begin your Homemade Eggnog journey by whisking together the egg yolks and sugar in a medium bowl. Don’t rush this step: whisk until the mixture is light in color and has a creamy texture. This foundation is what builds the smooth, custard-like base that makes eggnog so irresistible.
Step 2: Heat the Cream Mixture
In a saucepan over medium-high heat, combine the heavy cream, milk, ground nutmeg, and a pinch of salt. Stir often and carefully watch as the mixture approaches a bare simmer—this gentle heat infuses the cream with warming spices and prepares it to join the egg yolks without scrambling them.
Step 3: Temper the Egg Mixture
To avoid cooking the eggs too quickly, slowly add a spoonful of the hot cream mixture into the egg yolks while whisking vigorously. This step, called tempering, is crucial because it gradually raises the temperature of the eggs, ensuring a silky texture without lumps.
Step 4: Combine and Thicken
Once the egg mixture has tempered, pour everything back into the saucepan. Return it to medium heat and whisk constantly until the mixture thickens just enough to coat the back of a spoon and reaches about 160 degrees Fahrenheit. Remember, the eggnog will continue to thicken as it cools.
Step 5: Flavor and Chill
Remove the pan from heat and stir in vanilla extract and your chosen alcohol, if using. Strain the eggnog through a fine mesh sieve into a pitcher to ensure the texture is perfectly smooth. Cover tightly with plastic wrap and pop it into the fridge to chill—it’s worth the wait!
Step 6: Optional Smoothing
If you prefer your Homemade Eggnog to be super smooth and slightly thinner, blend the chilled mixture with a tablespoon or two of milk. This little extra step transforms it into an effortlessly creamy sip ready for any festive occasion.
How to Serve Homemade Eggnog
Garnishes
Presentation is part of the fun. A sprinkle of ground cinnamon or freshly grated nutmeg on top brightens both the look and aroma. For an extra indulgence, add a dollop of whipped cream—it’s the perfect balance to the spiced richness below.
Side Dishes
Homemade Eggnog pairs wonderfully with classic holiday treats like gingerbread cookies, buttery shortbread, or cinnamon-dusted pastries. The sweetness of these bites complements the creamy, spiced drink, making every mouthful feel extra festive.
Creative Ways to Present
Serve your eggnog in elegant mugs or vintage glasses to enhance the cozy vibe. For a bit of flair, rim the glass with cinnamon sugar or add a cinnamon stick as a stirrer. If serving a crowd, a festive punch bowl with floating star anise or thinly sliced citrus adds gorgeous visual appeal.
Make Ahead and Storage
Storing Leftovers
Once made, Homemade Eggnog keeps beautifully in the refrigerator for up to one week. Be sure to keep it tightly covered to maintain freshness, and always give it a gentle stir before serving to reincorporate any settled spices.
Freezing
Freezing eggnog isn’t generally recommended because it can separate and lose that silky smooth texture once thawed. For best results, enjoy your eggnog fresh or refrigerated.
Reheating
If you like your eggnog warm, gently heat it in a saucepan over low heat, stirring constantly to prevent curdling. Avoid boiling it, as that will change the texture. Warmed eggnog is especially cozy on chilly evenings!
FAQs
Can I make Homemade Eggnog without alcohol?
Absolutely! The alcohol is optional and simply adds warmth and extra flavor. Your eggnog will still be deliciously creamy and spiced without it—perfect for all ages.
Is it safe to use raw eggs in eggnog?
This recipe cooks the egg yolks gently when combined with the heated milk and cream, which reduces the risk associated with raw eggs. Just be sure to heat the mixture to at least 160 degrees Fahrenheit for safety.
Can I use egg substitutes or pasteurized eggs?
Sure! Pasteurized eggs are a great alternative for added food safety. Egg substitutes can work too, but might alter the taste and texture slightly.
How long does Homemade Eggnog last?
When stored properly in the refrigerator, it will stay fresh for up to one week. Always check for any off smells or separation before using leftovers.
What alcohol works best in Homemade Eggnog?
Traditional choices include rum, bourbon, and brandy. Each brings a unique character—rum gives sweetness, bourbon adds depth and warmth, and brandy offers a fruity kick. Use what you enjoy most or experiment to find your favorite.
Final Thoughts
Making Homemade Eggnog is truly a delightful experience that brings warmth and joy every time you sip it. This recipe’s creamy richness, warming spices, and touch of vanilla come together to create a holiday classic that’s both nostalgic and fresh. Whether it’s a chilly winter night or a festive celebration, give this Homemade Eggnog a try—you’ll be so glad you did!
Print
Homemade Eggnog Recipe
- Total Time: 20 minutes
- Yield: 6 servings 1x
- Diet: Halal
Description
This classic homemade eggnog recipe offers a rich, creamy, and perfectly spiced holiday beverage made with fresh eggs, cream, milk, and a touch of nutmeg, ideal for serving chilled with optional alcohol and festive garnishes.
Ingredients
Eggnog Base
- 6 large egg yolks
- 1/2 cup granulated sugar
- 1 cup heavy whipping cream
- 2 cups milk
- 1/2 teaspoon ground nutmeg
- Pinch of salt
- 1/4 teaspoon vanilla extract
Topping & Garnish
- Ground cinnamon (for topping)
- Fresh whipped cream (optional)
Optional
- Alcohol (such as rum, brandy, or bourbon, optional – see note)
Instructions
- Whisk Egg Yolks and Sugar: In a medium bowl, vigorously whisk together the egg yolks and granulated sugar until the mixture becomes light in color and creamy in texture.
- Heat Cream Mixture: In a saucepan over medium-high heat, combine the heavy cream, milk, ground nutmeg, and a pinch of salt. Stir frequently and heat the mixture until it barely simmers, but do not let it boil.
- Temper the Eggs: Slowly add a large spoonful of the hot milk mixture to the egg yolk mixture while whisking constantly to prevent curdling. Repeat this step with another spoonful to gradually warm the eggs.
- Combine Mixtures: Pour the tempered egg mixture back into the saucepan with the remaining hot milk mixture.
- Thicken the Eggnog: Whisk constantly over medium heat for about a minute or until the mixture thickens slightly and reaches about 160°F on a thermometer; it will continue to thicken as it cools.
- Add Flavorings: Remove the saucepan from heat and stir in the vanilla extract and your chosen alcohol if using.
- Strain and Chill: Pour the eggnog through a fine mesh strainer into a pitcher or container. Cover with plastic wrap and refrigerate until thoroughly chilled; the mixture will thicken as it cools.
- Optional Blending: For a smoother and thinner consistency, blend the chilled eggnog with 1 to 2 tablespoons of milk until creamy.
- Serve: Serve the eggnog chilled, garnished with a sprinkle of ground cinnamon or nutmeg and a dollop of fresh whipped cream if desired.
- Storage: Store any leftover eggnog in the refrigerator for up to one week.
Notes
- Use fresh, high-quality eggs for best flavor and safety.
- Alcohol is optional; traditional choices include rum, brandy, or bourbon, added to taste after cooking.
- Always temper the eggs carefully to avoid scrambling.
- The eggnog thickens as it cools; adjust consistency by blending with additional milk if preferred.
- Store homemade eggnog refrigerated and consume within one week.
- Prep Time: 10 minutes
- Cook Time: 10 minutes
- Category: Beverage
- Method: Stovetop, whisking, straining
- Cuisine: American
Nutrition
- Serving Size: 1 cup (240 ml)
- Calories: 290
- Sugar: 25 g
- Sodium: 90 mg
- Fat: 18 g
- Saturated Fat: 11 g
- Unsaturated Fat: 5 g
- Trans Fat: 0 g
- Carbohydrates: 26 g
- Fiber: 0 g
- Protein: 6 g
- Cholesterol: 205 mg
Keywords: homemade eggnog, classic eggnog recipe, holiday drinks, creamy eggnog, festive beverage
