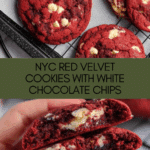
NYC Red Velvet Cookies Recipe
Introduction
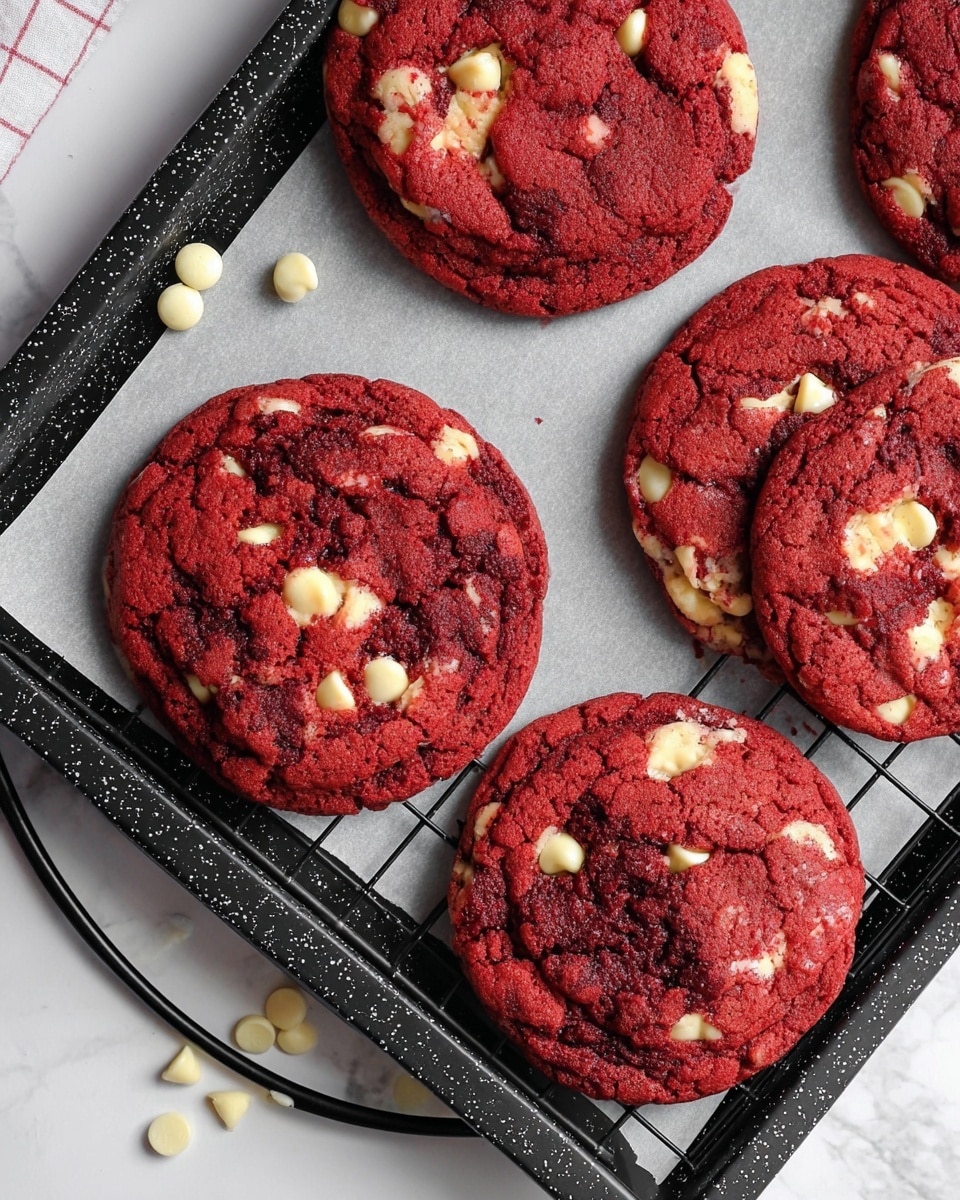
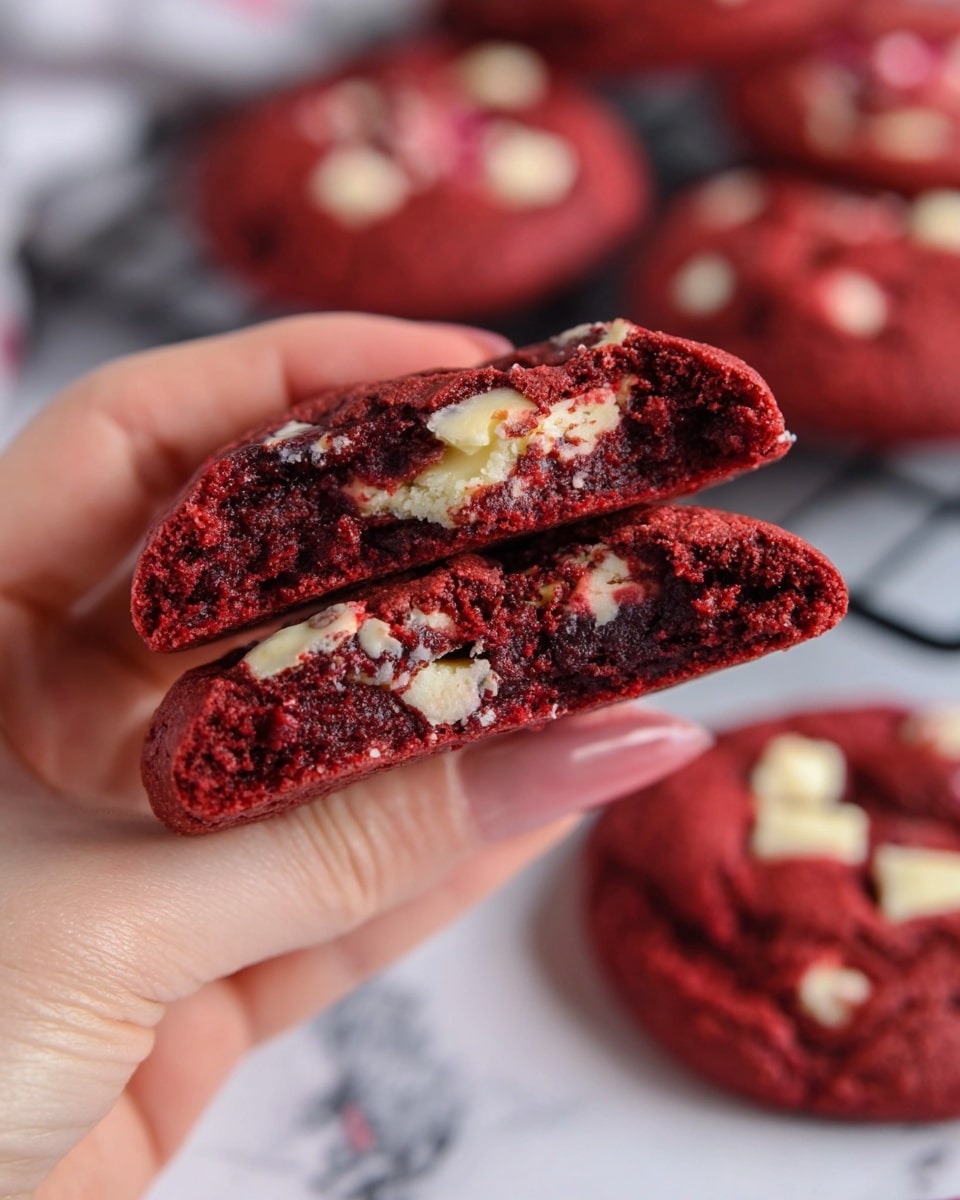
These NYC Red Velvet Cookies are soft, chewy, and packed with white chocolate chips. Their vibrant red color and rich cocoa flavor make them a standout treat perfect for any occasion.
Ingredients
- 125 g unsalted butter
- 100 g light brown sugar
- 75 g white granulated sugar
- 1 medium egg
- 1 tsp vanilla extract
- 1 tsp red food colouring
- 265 g plain flour
- 15 g cocoa powder
- 1 1/2 tsp baking powder
- 1/2 tsp bicarbonate of soda
- 1/2 tsp sea salt
- 300 g white chocolate chips (or chopped white chocolate)
Instructions
- Step 1: Add the butter, light brown sugar, and white sugar to a bowl and beat until creamy. A stand mixer with a beater attachment works best.
- Step 2: Mix in the egg, vanilla extract, and red food colouring, then beat again until fully combined.
- Step 3: Sift in the plain flour, cocoa powder, baking powder, bicarbonate of soda, and sea salt. Beat until the dough forms a consistent cookie dough texture.
- Step 4: Fold in the white chocolate chips, ensuring they are evenly distributed throughout the dough.
- Step 5: Weigh and roll the dough into eight balls, about 115-120g each. You can make smaller cookies if preferred.
- Step 6: Chill the cookie dough balls in the freezer for at least 30 minutes or in the fridge for about an hour.
- Step 7: Preheat your oven to 180°C fan (200°C regular). If your oven runs hot, reduce the temperature to between 160°C and 170°C.
- Step 8: Place the chilled cookie dough balls on a lined baking tray, spacing them apart. Four cookies per tray works well.
- Step 9: Bake for 12-14 minutes. The cookies will flatten on their own, but you can gently flatten them before baking if you prefer thinner cookies. Smaller cookies will need about 9 minutes baking time.
- Step 10: Let the cookies cool on the tray for at least 30 minutes so they set properly. They may look slightly underbaked when you take them out, but they continue to cook as they cool.
- Step 11: Enjoy your delicious red velvet cookies!
Tips & Variations
- For a more intense cocoa flavor, use Dutch-processed cocoa powder.
- Try swapping white chocolate chips for chunks of cream cheese for a tangy twist.
- Adding a teaspoon of espresso powder can deepen the chocolate taste without making the cookies taste like coffee.
- Make smaller cookies for bite-sized treats, adjusting baking time accordingly.
Storage
Store the cookies in an airtight container at room temperature for up to 5 days. To keep them soft, add a slice of bread to the container. You can also freeze the dough balls before baking for up to 3 months. Reheat baked cookies gently in the microwave for 10-15 seconds to refresh their softness.
How to Serve
Serve this delicious recipe with your favorite sides.
FAQs
Can I use regular flour instead of plain flour?
Plain flour (all-purpose flour) is best for this recipe as it provides the right texture. Using self-raising flour will change the rise and texture of the cookies, so it’s not recommended.
Why do the cookies look underbaked when they come out of the oven?
These cookies continue to set as they cool on the baking tray. Leaving them to rest for at least 30 minutes allows them to finish baking without drying out, resulting in the perfect soft, chewy texture.
Print
NYC Red Velvet Cookies Recipe
- Total Time: 1 hour 29 minutes
- Yield: 8 large cookies 1x
Description
Delicious NYC-style Red Velvet Cookies that are soft, chewy, and packed with rich cocoa flavor and white chocolate chips. Perfectly sized large cookies with a beautiful red hue and a sweet, creamy finish, ideal for a special treat or dessert.
Ingredients
Wet Ingredients
- 125 g unsalted butter
- 100 g light brown sugar
- 75 g white granulated sugar
- 1 medium egg
- 1 tsp vanilla extract
- 1 tsp red food colouring
Dry Ingredients
- 265 g plain flour
- 15 g cocoa powder
- 1 1/2 tsp baking powder
- 1/2 tsp bicarbonate of soda
- 1/2 tsp sea salt
Add-ins
- 300 g white chocolate chips (or chopped white chocolate)
Instructions
- Cream the Butter and Sugars: Add your butter, light brown sugar, and white granulated sugar to a bowl and beat until the mixture is smooth and creamy. A stand mixer fitted with a beater attachment works best for this step.
- Add Egg, Vanilla, and Food Colouring: Incorporate the medium egg, vanilla extract, and red food colouring into the creamy mixture and beat again until fully combined and vibrant red.
- Mix Dry Ingredients: Sift the plain flour, cocoa powder, baking powder, bicarbonate of soda, and sea salt into the wet mixture. Beat together until the cookie dough forms a uniform consistency.
- Fold in White Chocolate Chips: Add the white chocolate chips to the dough and beat or fold until they are evenly distributed throughout the dough.
- Portion the Cookie Dough: Weigh out the dough into eight equal balls, approximately 115-120 grams each. For smaller cookies, portion smaller balls accordingly.
- Chill the Dough: Place the cookie dough balls in the freezer for at least 30 minutes or refrigerate for about an hour to firm up the dough.
- Preheat the Oven: While the dough chills, preheat your oven to 180°C fan (200°C conventional). If your oven runs hot, adjust to 160-170°C accordingly.
- Arrange Dough on Baking Tray: Remove the chilled dough from the freezer or fridge and place the balls on a lined baking tray, spacing four per tray.
- Bake the Cookies: Bake in the preheated oven for 12-14 minutes. If you prefer flatter cookies, gently flatten the dough balls before baking. For smaller-sized cookies, reduce baking time to about 9 minutes.
- Cool the Cookies: Allow the cookies to cool on the baking tray for at least 30 minutes as they continue to set and bake slightly while cooling, ensuring a soft texture inside.
- Serve and Enjoy: Once cooled, enjoy these rich, chewy, and beautifully red velvet cookies with white chocolate chips.
Notes
- Chilling the dough is essential to prevent excessive spreading during baking and helps develop flavor.
- Use white chocolate chips or chopped white chocolate for pockets of sweet creaminess that complement the cocoa.
- Adjust the red food colouring to your desired intensity.
- If your oven runs hot, reduce temperature as noted to avoid burning the cookies.
- These cookies continue to bake slightly while cooling on the tray, so don’t worry if they look a bit soft when you first remove them.
- You can make smaller cookies by adjusting the dough ball size, but reduce baking time accordingly.
- Prep Time: 15 minutes
- Cook Time: 14 minutes
- Category: Dessert
- Method: Baking
- Cuisine: American
Keywords: red velvet cookies, white chocolate chips, NYC style cookies, chewy cookies, cocoa cookies, homemade cookies
