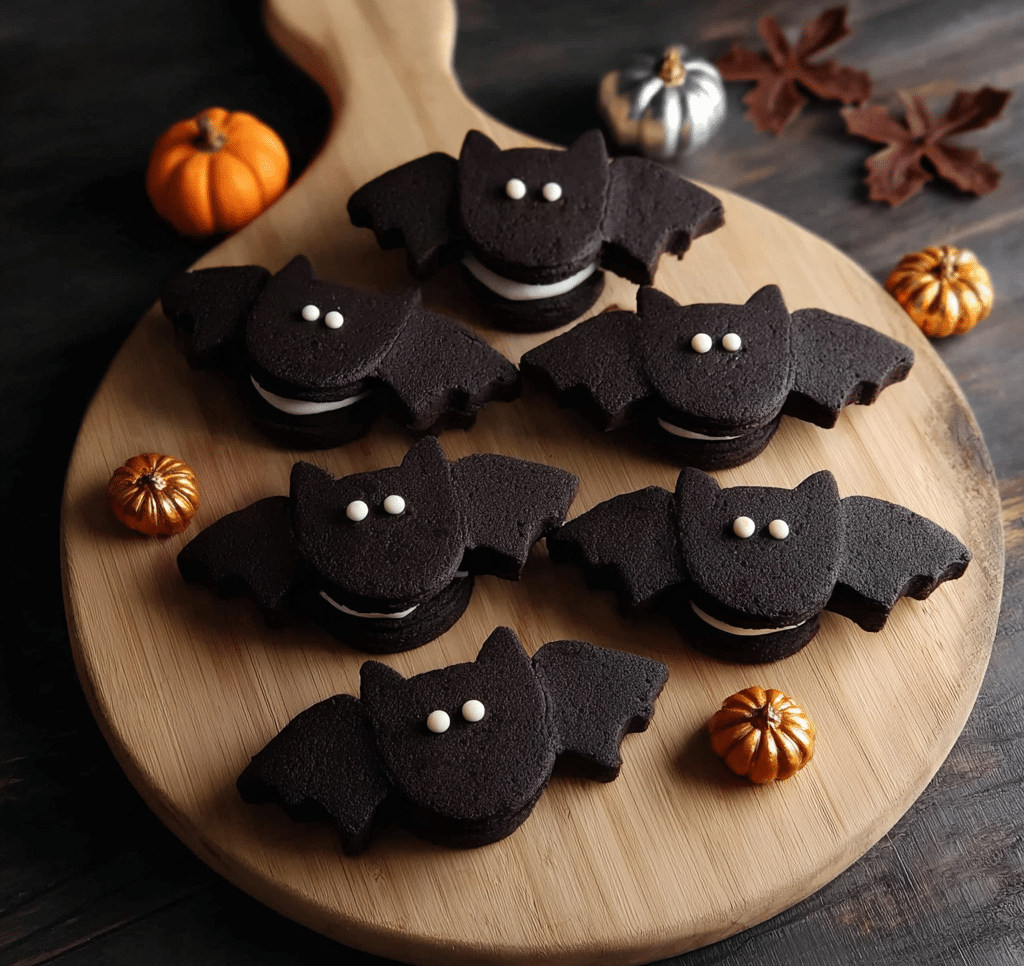
Oreo Style Bat Cookies Recipe
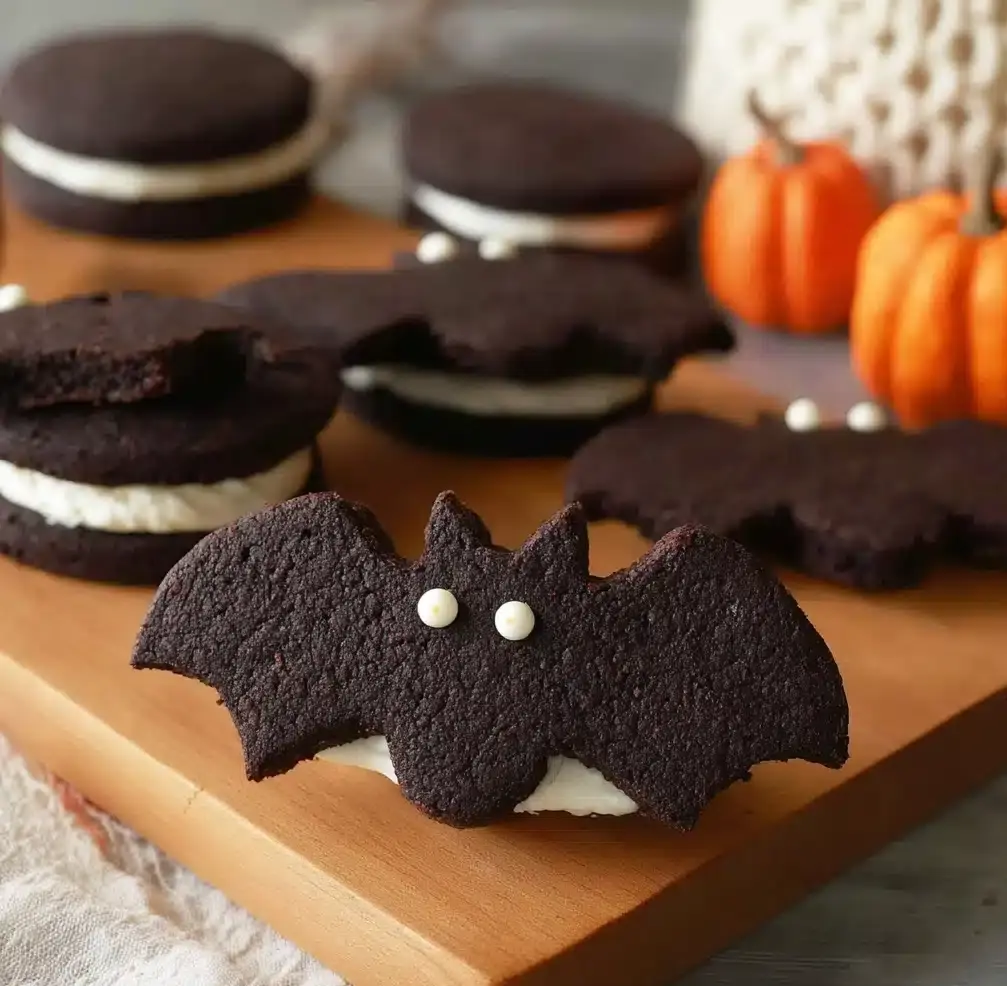
If you adore the nostalgic crunch and creaminess of classic Oreos but want to get a little creative and festive, these Oreo Style Bat Cookies are an absolute dream come true! Imagine rich, chocolatey cookies with a luscious buttercream filling inside, shaped just like adorable little bats that bring fun and flavor together in every bite. Whether you’re baking for a Halloween party or just craving a homemade treat with personality, these cookies offer a perfect balance of soft, crumbly texture and irresistible sweetness that makes them a standout crowd-pleaser. Let me walk you through how easy it is to whip up these charming Oreo Style Bat Cookies that are as delightful to make as they are to eat.
Ingredients You’ll Need
To nail the perfect Oreo Style Bat Cookies, we keep it simple but potent: every ingredient plays a crucial role in building flavor, texture, and that classic cookie look. Using quality cocoa powder for depth, buttery richness for tenderness, and golden syrup to add subtle chewiness, these essentials come together to create cookie magic.
- Butter, unsalted, cubed & soft (113 grams): Provides richness and moisture for the cookie dough.
- Granulated Sugar (100 grams): Sweetens and helps create a tender crumb.
- Golden Syrup (3 tbsp): Adds chewiness and a subtle caramel note, boosting overall flavor.
- Bicarbonate of Soda (½ tsp): Leavens the cookies just enough for a soft bite.
- Salt (⅛ tsp): Balances sweetness and enhances flavors.
- Plain Flour (157 grams): Forms the structure of your cookies, ensuring the right thickness.
- Cocoa Powder (48 grams): Delivers deep chocolate intensity and rich color.
- Butter, unsalted & melted (128 grams): Used to create a smooth, creamy buttercream filling.
- Vanilla Extract (¾ tsp): Adds warmth and depth to the buttercream.
- Pinch of Salt: A small dash for the filling to balance flavors perfectly.
- Icing Sugar, sieved (187 grams): Sweetens and lightens the buttercream to silky goodness.
- Sprinkles, oven-safe (20): For the cute bat eyes that really bring your cookies to life.
How to Make Oreo Style Bat Cookies
Step 1: Prepare The Cookie Dough
Start by combining the cubed, softened butter, granulated sugar, golden syrup, bicarbonate of soda, and salt in a large mixing bowl. Mix on low speed or by hand, then increase to medium and whip until light and fluffy. This creates the perfect base for your cookies with just the right texture and sweetness.
Step 2: Add Dry Ingredients and Form Dough
Sieve together the plain flour and cocoa powder directly over the whipped mixture. Gently fold and mix on low speed until the dough thickens and starts forming a smooth, flat disc. Knead by hand if needed, making sure the flour is fully incorporated to avoid any dry patches and ensure an even cookie texture.
Step 3: Chill the Dough
Wrap the dough disc or place it covered in the fridge for about an hour, or if you’re short on time, 5 minutes in the fridge followed by 25 minutes in the freezer works as well. Chilling helps the dough firm up, making it easier to roll out and cut without losing shape.
Step 4: Roll and Cut Out Cookies
Roll the chilled dough between two sheets of parchment paper to about 4-5 mm thickness. Use flour or powdered sugar on your cutter to prevent sticking and cut out bat shapes carefully for clean edges. Arrange them spaced out on parchment-lined baking trays, then press oven-safe sprinkles onto each cookie to create the adorable bat eyes.
Step 5: Bake to Perfection
Bake in a preheated oven at 180°C (160°C fan) for 10 to 15 minutes. Keep a close eye after 8-9 minutes; the cookies should still be soft but set enough to gently lift without cracking. Over-baking can dry out the chocolate cookies, so better to pull them out when slightly soft and let them cool.
Step 6: Make the Buttercream Filling
Melt the cubed butter over low to medium heat until it simmers and foam appears on top. Remove from heat, stir in vanilla and a pinch of salt, then sieve the melted butter to a clear golden liquid. Allow to cool for 5 minutes. Gradually mix this clarified butter into the sifted icing sugar until smooth and spreadable, adding a drop of food coloring if you want your buttercream extra white or with a fun tint.
Step 7: Assemble Your Oreo Style Bat Cookies
Spread a generous layer of buttercream onto the underside of one cookie, then sandwich with another bat cookie on top, pressing gently so the filling peeks out just a bit. You can also pipe the buttercream for a neat look, thinning it slightly with milk if needed. Chill the assembled cookies for at least 30 minutes to let the filling set.
How to Serve Oreo Style Bat Cookies
Garnishes
Adding a few extra sprinkles or edible glitter right before serving can make these Oreo Style Bat Cookies look even more festive and eye-catching. If you want a spooky vibe, consider tiny edible silver pearls as bat eyes or a dusting of cocoa powder for a mysterious touch.
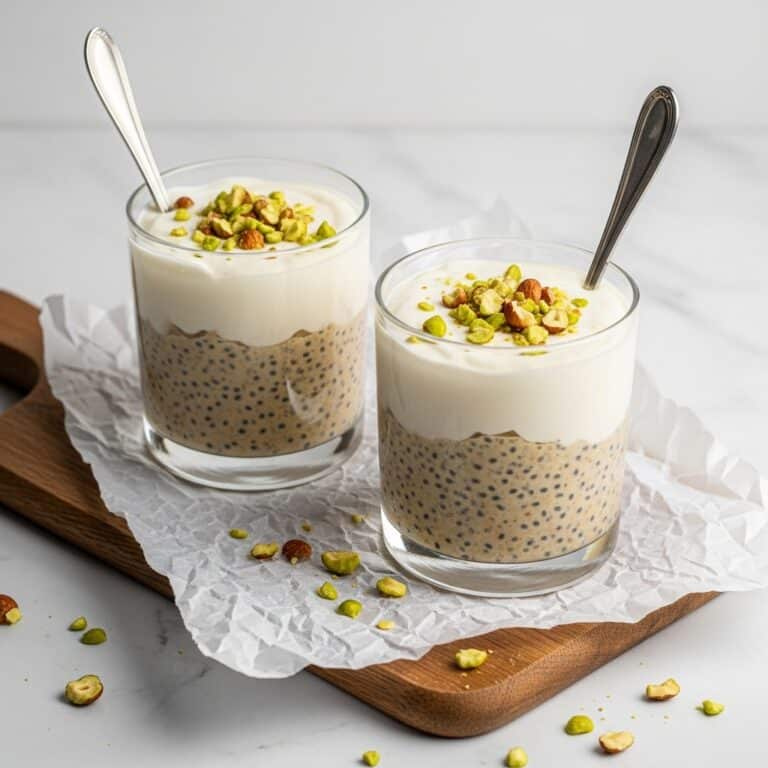
Side Dishes
Pair these chocolatey delights with a glass of cold milk, a hot cup of coffee, or even a rich hot chocolate for a cozy combo. A fruity dessert salad with berries can add some fresh contrast and brighten the overall dessert experience.
Creative Ways to Present
Get creative by serving your Oreo Style Bat Cookies on a dark slate board with little themed decorations like faux spider webs or mini pumpkins for a Halloween party. Arranging them in a circle with a “bat cave” invitation card makes the presentation fun and festive, guaranteed to impress your guests.
Make Ahead and Storage
Storing Leftovers
Once baked and assembled, these cookies keep beautifully in an airtight container at room temperature for up to three days. If you want them to last longer, storing the cookies in the fridge can extend their freshness for up to a week without losing their moist filling texture.
Freezing
You can freeze the cookie dough before baking or freeze the fully assembled cookies. For dough, shape and cut the cookies, freeze on a tray, then transfer to a bag for later bakes. Assembled cookies freeze well wrapped individually, and thaw gently in the fridge before serving.
Reheating
Since these cookies are soft and delicate, reheat them gently at a low oven temperature or briefly in the microwave just to warm the buttercream without melting it completely. This brings back that just-baked freshness and softness perfectly.
FAQs
Can I use regular syrup instead of golden syrup?
Yes, you can substitute golden syrup with light corn syrup or honey, but golden syrup gives a unique caramelized flavor and slight chewiness that enhances the cookies beautifully.
Are these cookies gluten-free?
This recipe uses plain flour which contains gluten. For gluten-free baking, substitute with a gluten-free flour blend designed for baking, but you may need to tweak quantities for texture.
What if I don’t have oven-safe sprinkles?
You can add eyes after baking by pressing mini chocolate chips or piping dots of buttercream instead. Just avoid sprinkles that will melt or discolor in the oven.
Can I make the filling dairy-free?
Absolutely! Use dairy-free butter alternatives and ensure the icing sugar is vegan-friendly. The method stays the same for a delicious vegan buttercream filling.
How long do these Oreo Style Bat Cookies last?
Stored properly in an airtight container, they last about 3 days at room temperature and up to 7 days in the fridge. For longer storage, freezing is your best bet.
Final Thoughts
I can’t wait for you to give these Oreo Style Bat Cookies a try! They’re such a delightful, charming twist on a favorite cookie style, perfect for holidays or any day you want to treat yourself. Once you taste that rich cocoa, buttery filling, and see those cute bat shapes, you’ll be hooked. Happy baking!
Print
Oreo Style Bat Cookies Recipe
- Total Time: 1 hour 32 minutes
- Yield: Approximately 20 cookies (10 sandwich pairs) 1x
- Diet: Vegetarian
Description
These Oreo Style Bat Cookies are chocolatey, soft-baked treats perfect for Halloween or any fun occasion. Featuring a rich cocoa dough with a smooth, creamy buttercream filling, these cookies are decorated with oven-safe sprinkles to resemble cute bat eyes. The recipe involves a simple chocolate cookie dough, a luscious homemade buttercream filling, and tips for perfect chilling and baking to achieve the ideal soft and tender texture.
Ingredients
Dry Ingredients
- 157 grams Plain Flour (5½ oz, 1¼ cup All Purpose)
- 48 grams Cocoa Powder (1¾ oz, ⅓ cup + 1 tbsp)
- ½ tsp Bicarbonate of Soda (Baking Soda)
- ⅛ tsp Salt
- 1 Pinch Salt (for buttercream)
- 187 grams Icing Sugar, sieved
Wet Ingredients
- 113 grams Butter, unsalted, cubed & soft (4 oz, ½ cup, 1 stick)
- 100 grams Granulated Sugar (3½ oz, ½ cup)
- 3 tbsp Golden Syrup (60g/2 oz)
- 128 grams Butter, unsalted & melted (6 oz, ¾ cup)
- ¾ tsp Vanilla Extract
Additional
- 20 Sprinkles, oven-safe (for bat eyes)
Instructions
- Prepare The Cookie Dough: Combine butter, granulated sugar, golden syrup, bicarbonate of soda, and salt in a large mixing bowl. Mix on low speed or by hand at first, then increase to medium speed and beat until the mixture is light and fluffy.
- Incorporate Dry Ingredients: Sieve the plain flour and cocoa powder over the wet mixture. Mix on low speed, pushing the dough down with the back of a spoon to help the flour absorb moisture. Continue mixing on low to medium speed until a thick dough forms. Knead by hand in the bowl to create a smooth, flat disc-shaped dough.
- Prepare Baking Sheets: Line baking trays with baking or parchment paper, ready for the cookies.
- Roll Out the Dough: Place the dough between two sheets of paper and dust with icing sugar if necessary. Roll out to 4-5 mm (about 1/6 to 1/5 inch) thickness, using two 10p coins as thickness guides if desired.
- Cut Out Cookies: Dust a cookie cutter with flour or icing sugar and cut out bat shapes. Neaten edges if needed. Transfer cookies carefully to the lined baking tray with small gaps between them. Re-roll scraps to make more cookies ensuring pairs for sandwiching.
- Add Eyes and Chill: Press oven-safe sprinkles onto the cookies to create bat eyes, or add these after baking. Chill the tray of cookies in the fridge for 1 hour, or 5 minutes in the fridge followed by 25 minutes in the freezer, to firm the dough before baking. Preheat the oven to 180°C (160°C fan)/350°F/Gas Mark 4 during chilling.
- Bake the Cookies: Bake cookies for 10 to 15 minutes until just set but still soft. Check around 8 or 9 minutes by gently pushing with a spatula—if they stick or crack, bake a little longer but avoid over-baking to keep them tender.
- Cool the Cookies: Allow the cookies to cool on the baking tray for a few minutes. Then transfer carefully to a cooling rack with the paper to cool completely.
- Make the Buttercream Filling: Melt the cubed butter in a small pot over medium-high heat, then reduce to low-medium and simmer, stirring occasionally. The butter will foam and leave residue on the pot’s sides. Remove from heat and stir in vanilla extract and a pinch of salt. Strain the melted butter to get a clear golden liquid and let it cool for 5 minutes.
- Sieve Icing Sugar: Sieve the icing sugar into a mixing bowl. Add white or purple food coloring at this stage if a whiter buttercream is desired.
- Combine Butter and Sugar: Slowly add the clarified melted butter to the icing sugar, mixing well after each addition. Mix until you reach a smooth, spreadable consistency. Thin with a little milk if you want to pipe the filling.
- Assemble the Cookies: Spread a generous amount of buttercream onto the underside of one cookie of each pair using an offset spatula or butter knife. Sandwich with the other cookie and gently press together. Any excess filling can be smoothed or scraped off.
- Optional Piping: Alternatively, pipe the buttercream filling onto cookies using a piping bag with a small nozzle. Thin the buttercream slightly with milk if needed for piping.
- Chill and Serve: Place assembled sandwich cookies in the fridge for at least 30 minutes to let the filling set. Serve chilled or at room temperature if cool.
- Storage: Store cookies in an airtight container or tin for up to 3 days at room temperature or up to 7 days refrigerated.
Notes
- Golden syrup can be substituted with light corn syrup or honey, but the flavor and texture may slightly vary.
- Use oven-safe sprinkles only to prevent melting or burning during baking.
- Chilling the dough is essential to prevent cookie spread and maintain defined bat shapes.
- Watch baking times carefully to avoid over-baking, which makes cookies dry and hard.
- Buttercream can be adjusted for consistency by adding a little milk if too thick or beaten longer if too thin.
- For a more authentic Oreo filling look, add a drop of purple food coloring to make the buttercream appear whiter.
- Prep Time: 20 minutes
- Cook Time: 12 minutes
- Category: Dessert, Cookies
- Method: Baking
- Cuisine: American
Nutrition
- Serving Size: 1 sandwich cookie (2 cookies with filling)
- Calories: 210 kcal
- Sugar: 18 g
- Sodium: 110 mg
- Fat: 12 g
- Saturated Fat: 7 g
- Unsaturated Fat: 4 g
- Trans Fat: 0 g
- Carbohydrates: 24 g
- Fiber: 2 g
- Protein: 2 g
- Cholesterol: 30 mg
Keywords: Oreo style cookies, chocolate cookies, buttercream filled cookies, bat cookies, Halloween cookies, sandwich cookies, cocoa cookies
