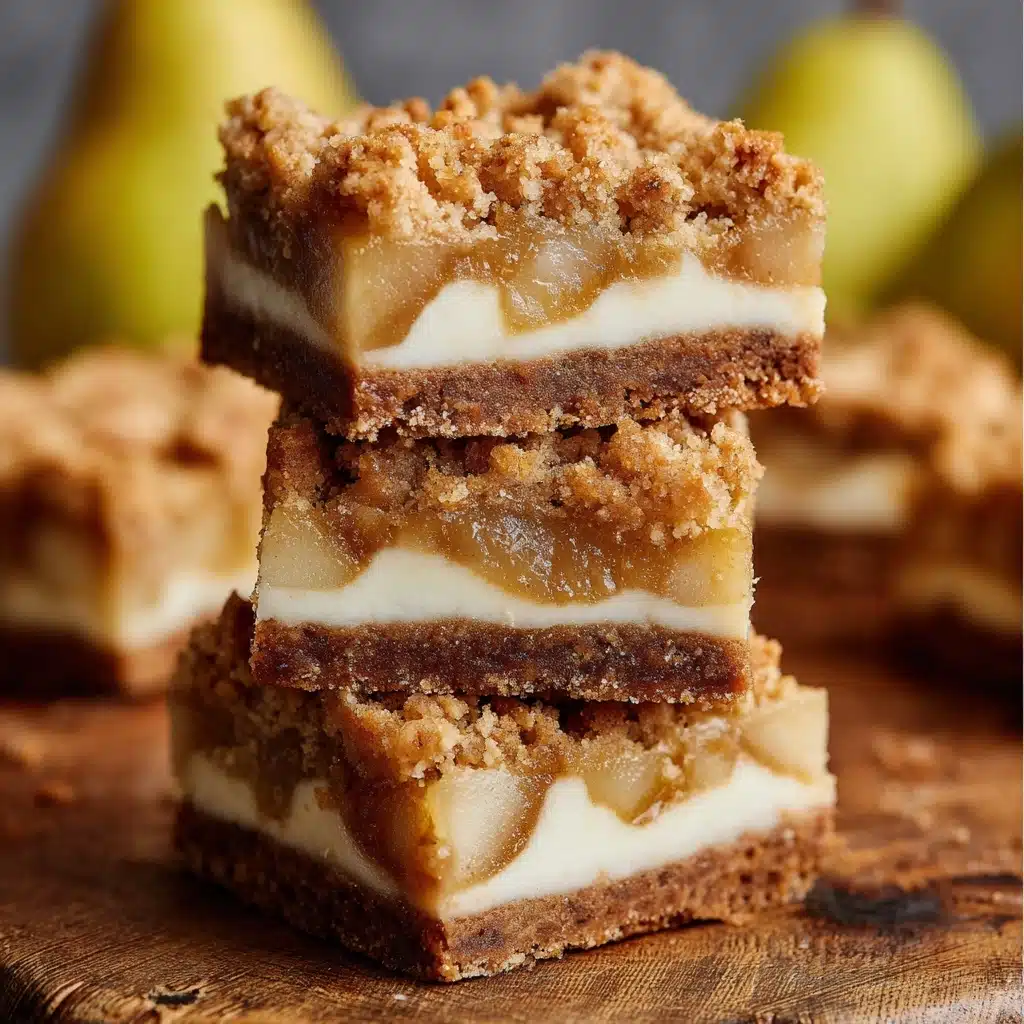
Pear Bars Recipe
If you’re a fan of autumn flavors and crave a dessert that’s both comforting and delightfully fresh, Pear Bars are exactly what you need. These bars marry a buttery, crumbly graham cracker crust with a luscious, spiced pear filling that’s sweet with just the right hint of warmth from cinnamon and ginger. Every bite offers a perfect balance between tender fruit and a rich, textured base. Trust me, once you try these Pear Bars, they’ll quickly become your go-to treat for cozy afternoons, holiday gatherings, or whenever you just want a slice of fruity happiness.
Ingredients You’ll Need
The beauty of this recipe lies in its simple, pantry-friendly ingredients that come together to create complex flavors and textures. Each component plays a vital role, from the graham cracker crumbs providing that irresistible crunch to the fresh pears that bring a juicy, natural sweetness. Let’s break down what you’ll need to make these Pear Bars a success.
- Graham cracker crumbs: This forms the base and adds a subtly sweet, crunchy texture to both crust and filling.
- Unsalted butter: Softened butter blends into the crumbs creating a moist, melt-in-your-mouth crust.
- Sugar and dark brown sugar: Granulated sugar sweetens the crust slightly, while dark brown sugar adds a rich, caramel note to the filling.
- Eggs: They help bind the filling and add moisture for a smooth, custardy texture.
- All-purpose flour: Just a bit to stabilize the filling without weighing it down.
- Vanilla extract: A splash of vanilla amps up the warmth and depth of flavor.
- Ground cinnamon and ground ginger: These spices infuse the filling with that perfect spicy warmth that complements the pears beautifully.
- Salt and baking powder: Essential for balancing sweetness and helping the bars rise slightly for a lighter bite.
- Peeled and diced pears: The star ingredient—ripe, juicy pears add freshness and a tender, fruity punch in every bite.
How to Make Pear Bars
Step 1: Prepare and Bake the Crust
Start by preheating your oven to 350°F (175°C). In a medium bowl, combine the graham cracker crumbs with softened butter and sugar. Use a fork or pastry cutter to blend them until the mixture is crumbly yet holds together when pressed. Press this mixture firmly into the bottom of a 9×13-inch baking dish, forming an even layer. Bake for about 10 to 12 minutes until it turns a lovely light golden color. This pre-baking step ensures your crust stays crisp and sturdy beneath the filling.
Step 2: Mix the Filling
While the crust is baking, use the same bowl to combine the dark brown sugar, graham cracker crumbs, and flour thoroughly. Next, stir in the ground cinnamon, ground ginger, salt, and baking powder until all the dry ingredients are well distributed. Beat in the eggs and vanilla extract until a thick, luscious batter forms. Finally, fold in the peeled and diced pears gently, ensuring they’re evenly mixed without breaking down too much. This filling is where all the magic happens, blending sweet, spice, and fruit in perfect harmony.
Step 3: Bake the Pear Bars
Once your crust has baked and cooled slightly, spread the pear filling evenly over it. Return your baking dish to the oven and bake for another 25 to 30 minutes. The bars are done when the center is set and no longer jiggly. Once out of the oven, allow the Pear Bars to cool completely before cutting them into squares. Cooling helps the bars firm up, making clean slicing easier and preserving that delightful gooey texture in the middle.
How to Serve Pear Bars

Garnishes
A dusting of powdered sugar adds a simple, elegant touch that complements the warm spices beautifully. For extra indulgence, a drizzle of honey or maple syrup elevates the natural pear sweetness. If you want some creaminess, a dollop of whipped cream or a scoop of vanilla ice cream melts delightfully over warm bars, inviting you to savor every bite slowly.
Side Dishes
Pear Bars are perfect on their own but pairing them with a hot beverage like chai tea, spiced cider, or a classic cup of coffee takes the experience to the next level. These drinks echo the warming spices in the bars, making your snack or dessert time feel cozy and special. For brunch, serve alongside a light salad or a soft cheese plate to contrast the sweetness.
Creative Ways to Present
If you’re bringing Pear Bars to a party or holiday gathering, consider cutting them into bite-sized pieces and arranging them on a festive platter topped with fresh pear slices or cinnamon sticks. Another fun idea is to layer chunks of the bars into dessert jars with whipped cream and crushed nuts, turning them into portable parfaits that guests will love.
Make Ahead and Storage
Storing Leftovers
Pear Bars keep beautifully at room temperature for up to two days if covered tightly, but they last even longer refrigerated for up to a week. Be sure to store them in an airtight container to maintain their moist texture and prevent the crust from becoming too soft.
Freezing
Want to enjoy these bars later? Wrap each bar or the entire slab tightly with plastic wrap and aluminum foil, then place in a freezer-safe container or bag. They freeze well for up to three months. When you’re ready, thaw them overnight in the refrigerator for the best texture.
Reheating
To bring back that just-baked warmth, pop individual bars in a 300°F oven for about 10 minutes or microwave for 20 to 30 seconds. Warm Pear Bars taste like they just came fresh out of the oven, making each bite cozy and comforting.
FAQs
Can I use canned or frozen pears instead of fresh?
Fresh pears provide the best texture and flavor, but if fresh aren’t available, canned or thawed frozen pears can work. Just be sure to drain them well to prevent excess moisture from making the filling soggy.
What type of pears are best for making Pear Bars?
Firm but ripe varieties like Bosc or Bartlett pears work beautifully. They hold their shape well during baking and offer a sweet, juicy flavor that complements the spice blend and crust perfectly.
Can I make these bars gluten-free?
Absolutely! Simply substitute the graham cracker crumbs and all-purpose flour with gluten-free versions. Just ensure your baking powder and spices are gluten-free as well for a safe and delicious treat.
How do I prevent the crust from becoming soggy under the filling?
Pre-baking the crust before adding the filling is key—it locks in the structure and prevents sogginess. Make sure to press the crust firmly and even, then cool slightly before spreading the filling on top.
Are these bars suitable for freezing and reheating without losing quality?
Yes, Pear Bars freeze very well! Just wrap them tightly and thaw them slowly. Reheat gently to restore that fresh-baked feel without drying out the filling or crust.
Final Thoughts
Whether you’re looking for a new dessert to wow your family or a cozy treat to enjoy with your morning coffee, Pear Bars are an absolute winner. Their delightful combination of a crumbly crust, spiced pear filling, and rich sweetness makes them unforgettable. Give this recipe a try — I promise these bars will quickly become a beloved favorite in your baking repertoire!