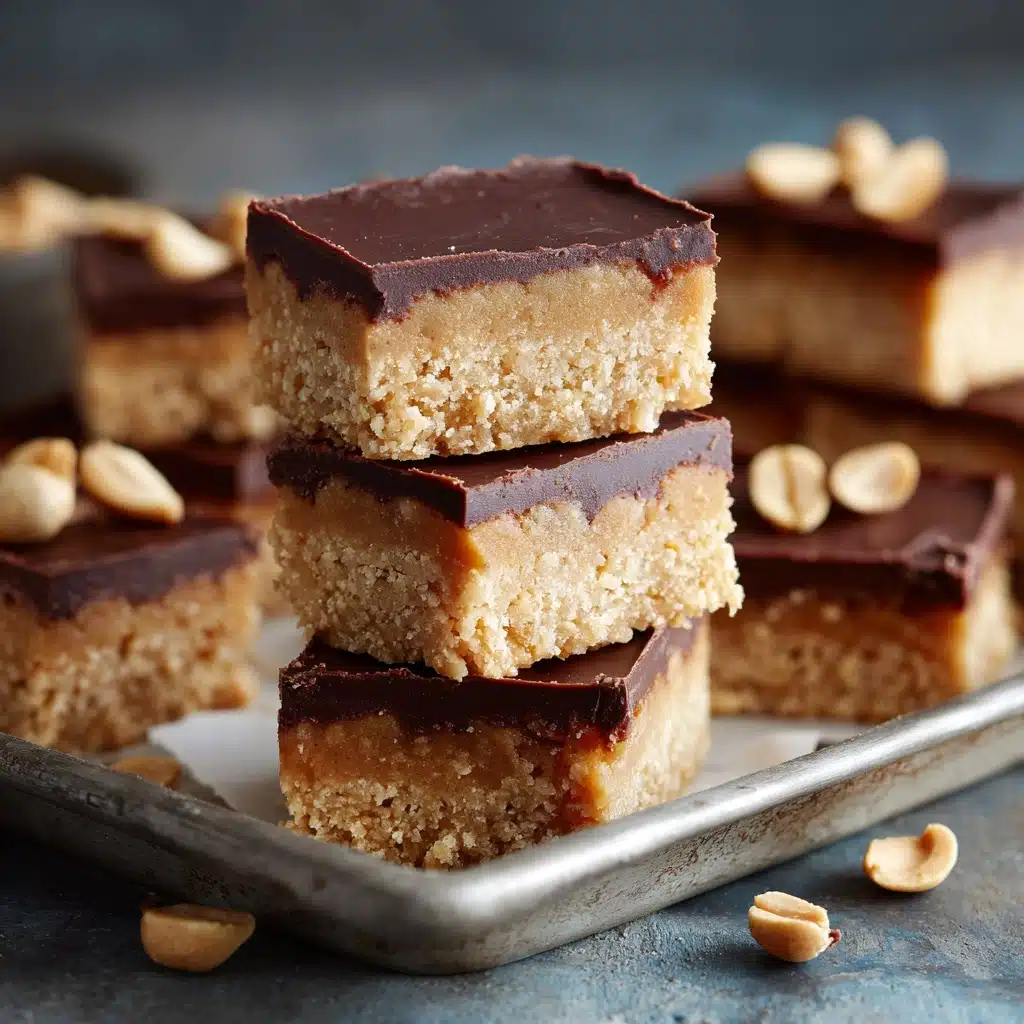
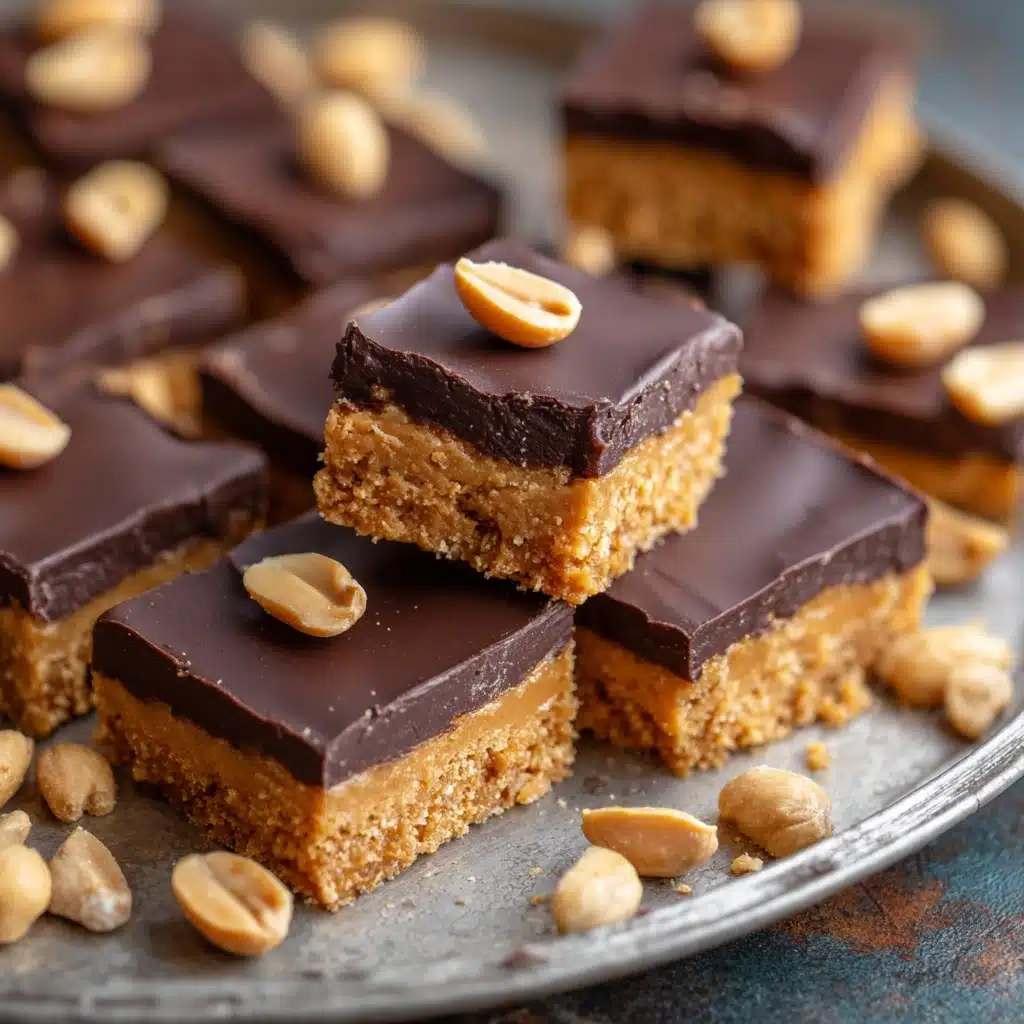
Protein Bars Recipe
Let’s talk about how life-changing homemade Protein Bars can be! Imagine chewy, nutty squares packed with rich peanut butter, a boost of your favorite protein powder, and just the right touch of sweetness. Unlike store-bought bars, you control every ingredient, making them truly your own. They’re ridiculously easy to whip up, deeply satisfying after a workout or as an afternoon pick-me-up, and honestly, I wouldn’t want to get through the week without a stash of these in my fridge! Whether you’re looking for a quick breakfast, a school snack, or a deliciously healthy dessert, Protein Bars are about to become your new best friend.
Ingredients You’ll Need
You’ll be amazed at how a few simple ingredients come together to create the best homemade Protein Bars. Each one plays a crucial role in the flavor, texture, and even the gorgeous look of these treats. Don’t skip or skimp—these building blocks are what make every bite delicious!
- Peanut Butter (or allergy-friendly sub): Provides richness and that classic creamy texture, plus healthy fats for staying power.
- Unsweetened Protein Powder (any variety): This is the protein powerhouse; pick a flavor you love, since it shines through in each bar.
- Pure Maple Syrup, Honey, or Agave: Adds natural sweetness and helps bind everything together—choose the option that fits your taste or dietary needs.
- Salt: Just a dash wakes up the entire flavor profile, balancing the sweetness and making the peanut butter pop.
- Melted Chocolate Chips (optional): A decadent finish! Whether drizzled over or dunked, chocolate takes these bars from snack to irresistible treat.
How to Make Protein Bars
Step 1: Prep Your Ingredients
Before jumping in, measure out everything you’ll need. Having your peanut butter, protein powder, sweetener, and salt ready ensures the process is smooth and quick—plus, it gives you time to melt chocolate chips if you’re opting for the extra-indulgent topping!
Step 2: Mix the Dough
Combine the peanut butter, unsweetened protein powder, maple syrup (or honey/agave), and salt in a mixing bowl. Stir with a sturdy spoon or spatula until a thick, uniform dough forms. The dough will be thick (think play-dough) but should hold together easily—if you find it’s a bit crumbly, add a teaspoon of water or a little extra nut butter until just right.
Step 3: Shape the Protein Bars
Now comes the fun part! Either press the dough firmly and evenly into a parchment-lined 8×8-inch pan, or shape it by hand into individual bars. Press down well; compacting the bars will help them hold their shape beautifully once chilled.
Step 4: Add Chocolate (Optional)
If you’re adding chocolate, melt your chocolate chips gently (microwave or double boiler) and stir in a little oil for a glossy sauce if you like. Spread this blissful layer over the top of the slab, or dip each bar individually for a hand-held treat. This step is 100 percent worth it for chocolate lovers!
Step 5: Chill and Slice
Refrigerate the pan or your hand-formed bars until they’re set and firm—usually about 1-2 hours. Once chilled, slice into bars or squares. You’ll be greeted by perfect, portable Protein Bars ready for any adventure.
How to Serve Protein Bars
Garnishes
A sprinkle of flaky sea salt or a dusting of cocoa powder makes everything look and taste more special. Sometimes I’ll chop up a few roasted peanuts or a handful of mini chocolate chips and press them onto the bars before the chocolate sets—this adds crunch and a gourmet finish!
Side Dishes
Pair Protein Bars with a creamy Greek yogurt parfait or a fresh fruit salad for a light and balanced snack plate. If you’re after a satisfying breakfast, I love serving them alongside a steaming mug of matcha or cold brew coffee.
Creative Ways to Present
Wrap each bar in parchment for meal-prep on-the-go, or stack them in a mason jar tied with ribbon for a charming gift. For parties, cut them into bite-sized cubes and skewer with toothpicks—nobody can resist “Protein Bars” bites at a brunch spread!
Make Ahead and Storage
Storing Leftovers
Store your finished Protein Bars in an airtight container in the fridge. They stay fresh, moist, and chewy for up to a week, making them a dream for meal prepping Sunday nights.
Freezing
Need to prep farther ahead? Stack Protein Bars between layers of parchment and freeze in a zip-top bag or container. They’ll keep their taste and texture for up to two months. Just thaw overnight in the fridge before enjoying.
Reheating
Protein Bars are best enjoyed chilled or at room temperature. If you want them a touch softer (for that just-made, melty chocolate effect), microwave a bar for 10 seconds—just long enough to make it extra tempting!
FAQs
Can I use flavored protein powder?
Absolutely! In fact, chocolate or vanilla protein powder can infuse a whole new vibe into your Protein Bars. Just make sure you love the flavor you’re starting with, since it’ll be front and center in the finished bars.
Are these Protein Bars vegan?
They can be! Use a plant-based protein powder and opt for maple syrup or agave instead of honey. Don’t forget to double-check your chocolate chips are dairy-free if making the optional topping.
How can I make these nut-free?
No problem—just swap peanut butter for sunflower seed butter or soy nut butter. Both work beautifully and create delicious, allergy-friendly Protein Bars everyone can enjoy.
Can I add extras like dried fruit or seeds?
Totally! Stir in some chia seeds, flax, shredded coconut, or chopped dried berries for extra flavor and nutrients. Just keep the overall dough consistency thick enough to hold together—it should still shape easily.
Why is my dough too dry or too sticky?
Since protein powders can vary, the dough consistency might change. If it’s too dry, splash in a teaspoon of milk, water, or more nut butter. Too sticky? Sprinkle in a little extra protein powder until it firms up. Adjust and taste as you go!
Final Thoughts
Once you try homemade Protein Bars, you’ll never look at the store-bought ones the same way again. They’re easy, endlessly adaptable, and so delicious you’ll want to share them with everyone you know. Give this recipe a go—you might find you crave these as much as I do!
Print
Protein Bars Recipe
- Total Time: 2 hours
- Yield: 12 bars 1x
- Diet: Vegetarian
Description
These homemade protein bars are a delicious and nutritious snack option. Made with peanut butter, protein powder, and a touch of sweetness, they are easy to customize and perfect for a quick energy boost.
Ingredients
Main Ingredients:
- 1 1/2 cup peanut butter (or allergy-friendly sub)
- 3/4 cup unsweetened protein powder of choice (90 grams)
- 1/4 cup pure maple syrup, honey, or agave
- 1/2 tsp salt
Optional:
- 4 oz melted chocolate chips
Instructions
- Prepare the Dough: Mix all ingredients except optional chocolate chips to form a dough.
- Shape the Bars: Either shape the dough into bars by hand or smooth it into a lined 8×8 pan. Refrigerate until chilled, then cut into bars.
- Add Chocolate Coating (Optional): If desired, spread the melted chocolate over the pan before chilling. Alternatively, dip the individual bars into the chocolate sauce and chill to set.
- Prep Time: 10 minutes
- Cook Time: 0 minutes
- Category: Snack
- Method: Mixing, Refrigeration
- Cuisine: Global
Nutrition
- Serving Size: 1 bar
- Calories: 220
- Sugar: 5g
- Sodium: 150mg
- Fat: 15g
- Saturated Fat: 3g
- Unsaturated Fat: 9g
- Trans Fat: 0g
- Carbohydrates: 11g
- Fiber: 2g
- Protein: 10g
- Cholesterol: 0mg
Keywords: protein bars, homemade, snack, peanut butter, protein powder


