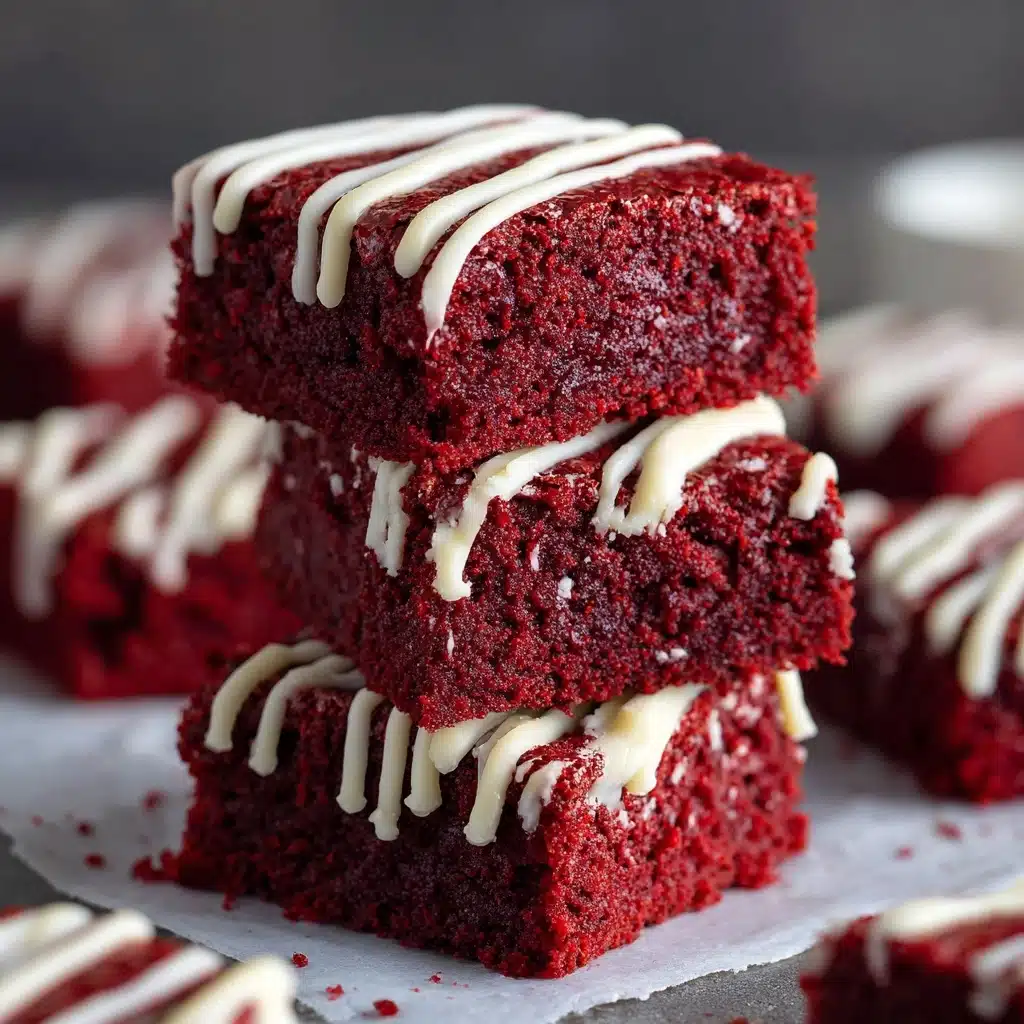
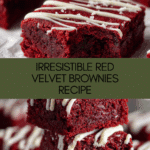
Red Velvet Brownies Recipe
These Red Velvet Brownies are the perfect fusion of classic cake and indulgent fudgy brownie, boasting a vibrant color, a subtle cocoa flavor, and the perfect chewy-crisp edges. This recipe delivers everything you could crave in a dessert: a rich red crumb, a luscious aroma, and pops of sweetness from white chocolate. Whether you’re baking for a special occasion or just treating yourself, these Red Velvet Brownies will win hearts at first bite.

Ingredients You’ll Need
Don’t be intimidated by the ingredient list — every single item here plays a role in building those signature Red Velvet Brownies flavors and textures. Each one helps create the moist, colorful, and utterly irresistible squares we all love!
- Unsalted butter, melted: Gives your brownies ultra-richness with that signature fudgy texture.
- Semi-sweet chocolate bar, chopped: Melting real chocolate into the batter adds depth and a velvety bite.
- Granulated sugar: Sweetens the brownies and gives them that glossy, crackly top.
- Large eggs: The secret to structure and that dreamy chewiness.
- Vanilla extract: Brightens the chocolate notes and rounds out all the flavors.
- White vinegar: Essential for a touch of tang and to react with the cocoa for that classic red velvet zing.
- Red gel food coloring: This gives iconic red hue; gel works best for vibrant color without thinning the batter.
- Unsweetened cocoa powder: Lends that mellow cocoa flavor, just enough to balance each bite.
- All-purpose flour: Your base for soft yet substantial brownies.
- Salt: Enhances all the flavors (don’t skip it!).
- White chocolate chips (optional): Stir them in for creamy pockets or drizzle melted over the top for eye-catching flair.
How to Make Red Velvet Brownies
Step 1: Prep Your Pan and Oven
Preheat your oven to 350°F for even baking, and line an 8×8 inch baking pan with parchment paper. A parchment sling will help your Red Velvet Brownies pop right out after baking, and makes post-bake cleanup a breeze.
Step 2: Melt the Butter and Chocolate
Combine the melted butter and chopped semi-sweet chocolate in a large microwave-safe bowl. Heat in 30-second bursts, stirring each time, until fully smooth and glossy. This step creates a deep chocolate flavor base that makes these brownies utterly luxurious.
Step 3: Mix In Sugar, Eggs, and More
Whisk the granulated sugar into your melted butter-chocolate mixture until combined. Then, add the eggs one at a time, beating well after each – this ensures your brownies have that distinctive dense and chewy texture. Now’s the time to stir in vanilla extract, white vinegar (for tanginess and lift), and red gel food coloring for that signature red.
Step 4: Combine the Dry Ingredients
In a separate bowl, sift together the cocoa powder, all-purpose flour, and salt. Sifting gives you an even, lump-free mixture that blends seamlessly into your wet ingredients, helping your Red Velvet Brownies bake up perfectly.
Step 5: Bring It All Together
Gradually fold the dry ingredients into the wet mixture, mixing until just combined. Take care not to overmix (which can make brownies tough). For an extra treat, gently fold in white chocolate chips at this stage for creamy bites in every square.
Step 6: Pour and Smooth
Pour your luscious red batter into the prepared pan, using a spatula to spread it evenly into every corner. The better you smooth the surface, the more picture-perfect your Red Velvet Brownies will look when sliced.
Step 7: Bake to Perfection
Bake in your preheated oven for 30-35 minutes, or until a toothpick inserted into the center comes out with a few moist crumbs attached. You want gooey, not raw – don’t overbake for optimal fudgy deliciousness!
Step 8: Cool Completely
Let the brownies cool in the pan. Patience pays off here, as cutting too soon can ruin their shape. Full cooling ensures clean squares and the best chewy-meets-cakey texture.
Step 9: Optional – White Chocolate Drizzle
If you love a little extra pizzazz, drizzle melted white chocolate over the cooled brownies. Allow it to set before slicing and serving. It’s a simple touch that takes your Red Velvet Brownies from comforting to stunning.
How to Serve Red Velvet Brownies
Garnishes
Let your Red Velvet Brownies shine with a dusting of powdered sugar, a flurry of white or dark chocolate shavings, or a delicate drizzle of melted white chocolate. You can even top each square with a single berry or a dollop of whipped cream to make them look bakery-worthy.
Side Dishes
Pair these brownies with a scoop of vanilla ice cream or a spoonful of tangy cream cheese frosting for a true red velvet experience. If you’re planning a dessert platter, add fresh raspberries, strawberries, or a handful of mixed nuts for extra flavor contrast.
Creative Ways to Present
Cut your Red Velvet Brownies into fun shapes using cookie cutters, or stack mini squares for an eye-catching treat tower. Wrap them in wax paper or place in cellophane bags as adorable edible gifts for birthdays, Valentine’s Day, or just because.
Make Ahead and Storage
Storing Leftovers
Store leftover Red Velvet Brownies in an airtight container at room temperature for up to 4 days. If your kitchen is very warm, pop them in the fridge to keep them especially moist, but let them return to room temp before serving for the best texture.
Freezing
For longer storage, freeze cooled, unsliced brownies (or individual squares) double-wrapped in plastic and foil for up to 2 months. Thaw overnight in the fridge or on the counter for about an hour before enjoying again.
Reheating
To recapture fresh-from-the-oven magic, warm individual brownies in the microwave for 10–15 seconds. This brings back their irresistible fudginess and perfectly melts any chocolate chips inside.
FAQs
Can I use liquid food coloring instead of gel?
Gel food coloring is recommended because it delivers a more vibrant red without watering down your batter. If you only have liquid, use a bit more, but be careful not to overdo it or your batter might get too thin.
Can I make these Red Velvet Brownies gluten-free?
Yes! Swap the all-purpose flour for your favorite 1:1 gluten-free baking blend. Be sure to check that all other ingredients (like chocolate) are certified gluten-free if you’re baking for someone with allergies.
Why is there vinegar in this recipe?
Vinegar gives red velvet desserts their classic tang and helps brighten both the flavor and color, reacting with the cocoa powder to support that subtle undertone and vibrant hue.
Should I use Dutch-processed or natural cocoa powder?
Natural unsweetened cocoa powder is preferred for authentic red velvet flavor and for reacting correctly with the vinegar and baking soda if used. Dutch-processed will work, but the flavor will be less traditional and the color might turn out less vibrant.
How do I know when the brownies are done?
Insert a toothpick near the center of the pan; if it comes out with only a few moist crumbs (not raw batter), your Red Velvet Brownies are ready. Remember, a little underbaking is better than overbaking for maximum fudgy goodness!
Final Thoughts
If you’re swooning just thinking about Red Velvet Brownies, don’t hesitate — gather your ingredients and give this recipe a try. They’re as impressive on a plate as they are comforting with a cup of coffee. Once you make them, they’re guaranteed to become a new favorite for celebrations and cozy nights alike.
Print
Red Velvet Brownies Recipe
- Total Time: 45-50 minutes
- Yield: 12 brownies 1x
- Diet: Vegetarian
Description
Indulge in the rich and decadent flavors of Red Velvet Brownies. These fudgy treats are a delightful twist on the classic red velvet cake, perfect for any occasion.
Ingredients
Brownie Batter:
- 3/4 cup unsalted butter, melted
- 2 oz chopped semi-sweet chocolate bar
- 1 & 1/4 cup granulated sugar
- 2 large eggs
- 2 teaspoons vanilla extract
- 1 teaspoon white vinegar
- 1/2 tablespoon red gel food coloring
- 2 tablespoons unsweetened cocoa powder
- 1 & 1/4 cup all-purpose flour
- 1/4 teaspoon salt
Optional Add-In:
- 1/2 cup white chocolate chips
Instructions
- Preheat Oven: Preheat the oven to 350°F and line an 8×8 inch baking pan with parchment paper.
- Melt Butter and Chocolate: In a large microwave-safe mixing bowl, melt the butter and chopped chocolate in the microwave in 30-second increments. Stir until fully melted.
- Mix Wet Ingredients: Add granulated sugar, eggs (one at a time), vanilla extract, white vinegar, and red food coloring. Mix until combined.
- Combine Dry Ingredients: In a separate bowl, sift together cocoa powder, flour, and salt.
- Combine Wet and Dry: Gradually add the dry ingredients to the wet mixture, mixing until just combined. Fold in white chocolate chips if desired.
- Bake: Pour batter into the prepared pan and bake for 30-35 minutes until a toothpick inserted comes out with moist crumbs.
- Cool and Serve: Allow the brownies to cool completely in the pan before cutting into squares. Drizzle melted white chocolate on top if desired.
Notes
- You can customize these brownies by adding nuts or cream cheese frosting for extra flair.
- Store leftovers in an airtight container for up to 3 days.
- Prep Time: 15 minutes
- Cook Time: 30-35 minutes
- Category: Dessert
- Method: Baking
- Cuisine: American
Nutrition
- Serving Size: 1 brownie
- Calories: 280
- Sugar: 22g
- Sodium: 120mg
- Fat: 16g
- Saturated Fat: 10g
- Unsaturated Fat: 5g
- Trans Fat: 0g
- Carbohydrates: 32g
- Fiber: 1g
- Protein: 3g
- Cholesterol: 65mg
Keywords: Red Velvet Brownies, Dessert, Easy, Chocolate, Fudgy, Homemade