Copycat Dairy Queen Ice Cream Cake Recipe
Introduction
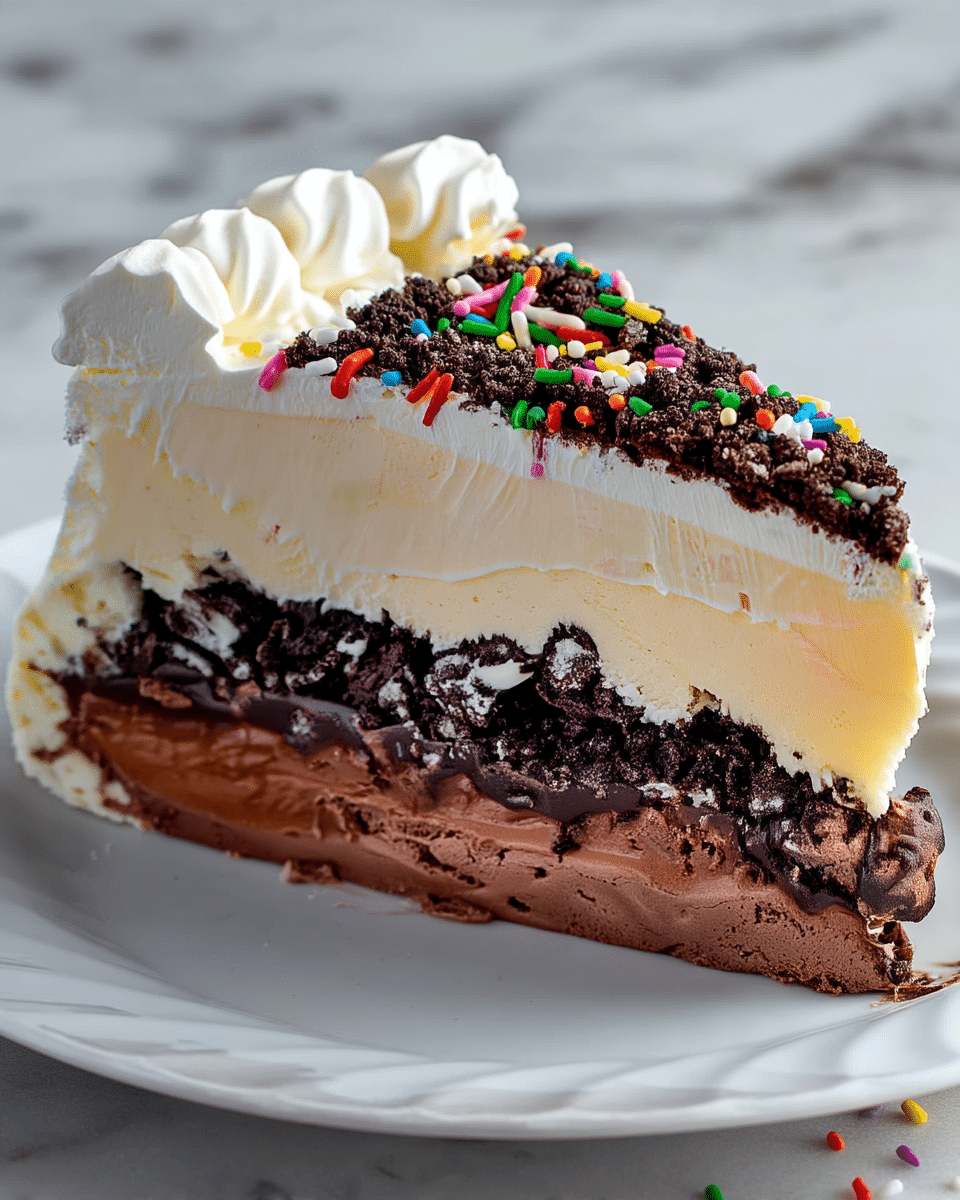
This Copycat Dairy Queen Ice Cream Cake is a delightful treat combining rich chocolate, creamy vanilla, and a crunchy cookie crumble. It’s perfect for celebrations or whenever you crave a frozen indulgence with familiar flavors.
Ingredients
- 20 chocolate sandwich cookies (crushed, centers intact)
- 4 tablespoons salted sweet cream butter (melted)
- 1 quart chocolate ice cream
- 1 quart vanilla ice cream
- 11.75 ounces hot fudge topping
- 2 cups cold heavy cream
- 1¼ cups powdered sugar
- 1½ teaspoons clear vanilla flavoring (not vanilla extract)
- Colorful sprinkles
Instructions
- Step 1: Line a 9-inch springform pan with plastic wrap and set aside.
- Step 2: Preheat the oven to 350°F. Line a 10×15-inch baking sheet with parchment paper and set aside.
- Step 3: In a small bowl, combine the crushed chocolate sandwich cookies with the melted butter until fully mixed.
- Step 4: Spread the coated cookie crumbs evenly on the prepared baking sheet.
- Step 5: Bake for 7 to 8 minutes, then remove and let cool completely.
- Step 6: While the crumbs bake, take the chocolate ice cream out of the freezer to soften for 15–20 minutes.
- Step 7: Press the softened chocolate ice cream evenly into the bottom of the springform pan, then freeze for 30 minutes to 1 hour.
- Step 8: Soften the hot fudge topping by microwaving the closed container for 20 seconds, then stir thoroughly.
- Step 9: Spread the softened hot fudge evenly over the chocolate ice cream layer.
- Step 10: Sprinkle the cooled baked cookie crumbs evenly on top of the fudge layer, then return the pan to the freezer for 1 hour.
- Step 11: Remove the vanilla ice cream from the freezer about 15–20 minutes before use to soften slightly.
- Step 12: Spread the softened vanilla ice cream evenly over the cookie crumb layer and freeze for 4 to 6 hours or overnight.
- Step 13: About 30 minutes before frosting, chill your mixing bowl in the freezer if using a stand or handheld mixer.
- Step 14: Whip the cold heavy cream, powdered sugar, and clear vanilla flavoring until stiff peaks form, about 3 to 4 minutes. Reserve 1 cup of whipped cream in a piping bag fitted with a large star tip.
- Step 15: Remove the ice cream cake from the freezer and quickly remove the outer edges of the springform pan.
- Step 16: Using a cake lifter or sturdy spatula, lift the cake off the plastic wrap and transfer it to a serving platter or cake board.
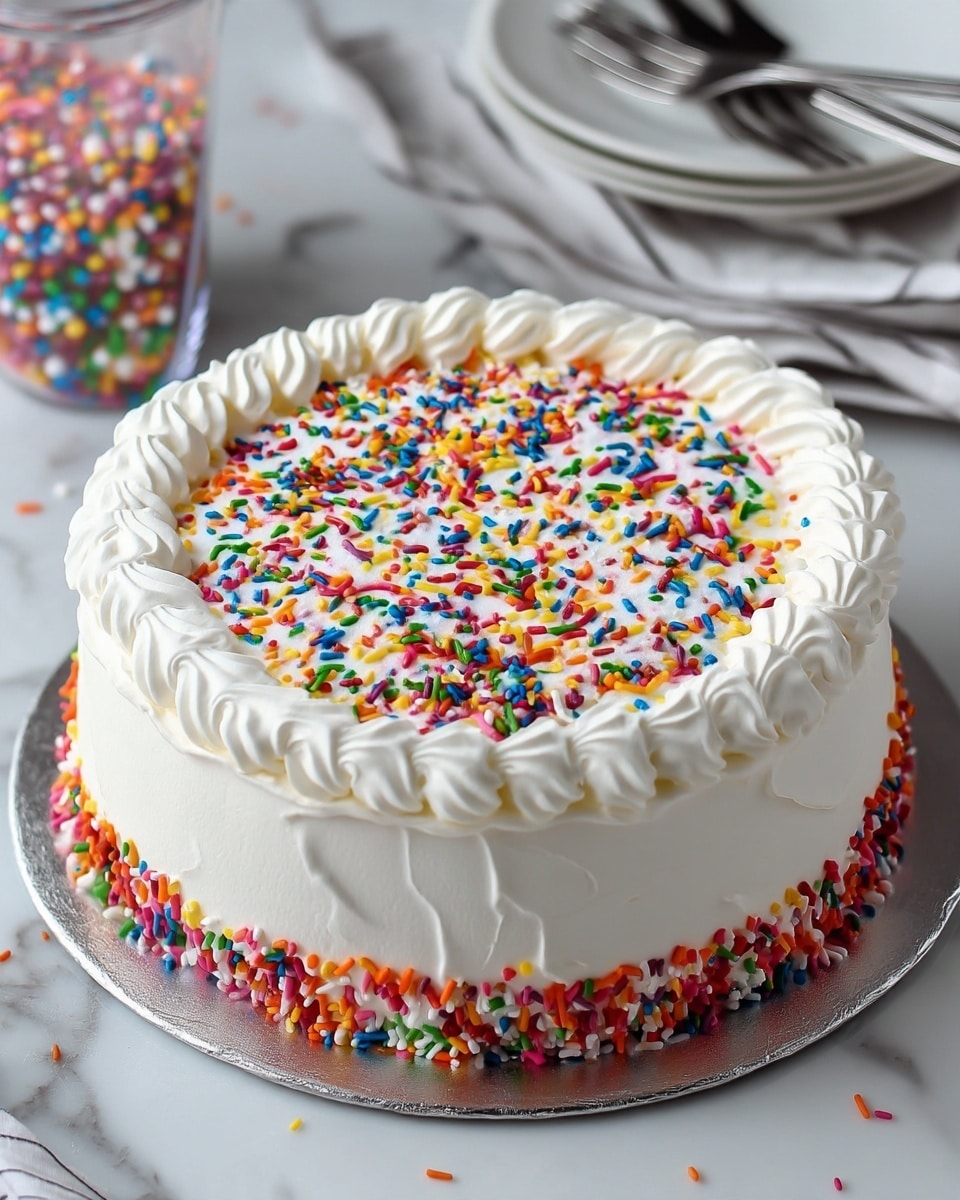
- Step 17: Spread the remaining whipped cream evenly over the top and sides of the cake.
- Step 18: Pipe decorative swirls or shells around the top edge using the reserved whipped cream.
- Step 19: Sprinkle colorful sprinkles over the decorated cake.
- Step 20: Return the finished cake to the freezer until ready to serve.
Tips & Variations
- Use clear vanilla flavoring instead of vanilla extract for a pure white whipped cream frosting without discoloration.
- Substitute the chocolate sandwich cookies with your favorite cookie to customize the crunch and flavor.
- For easier spreading, let the ice cream soften just until slightly pliable but not melted.
- If you don’t have a springform pan, you can use a regular cake pan lined with parchment and plastic wrap for easier removal.
Storage
Keep the ice cream cake tightly covered and stored in the freezer. It will maintain its best quality for up to one week. Before serving, allow it to sit at room temperature for 5–10 minutes to soften slightly for easier slicing.
How to Serve
Serve this delicious recipe with your favorite sides.
FAQs
Can I prepare the cake ahead of time?
Yes, this cake is ideal for making in advance. Simply freeze it overnight or for up to a week before decorating and serving.
What if I don’t have clear vanilla flavoring?
You can use regular vanilla extract, but note it may give the whipped cream a slight off-white hue instead of bright white.
Print
Copycat Dairy Queen Ice Cream Cake Recipe
- Total Time: 5 hours 45 minutes (including freezing time)
- Yield: 12 servings 1x
- Diet: Vegetarian
Description
This Copycat Dairy Queen Ice Cream Cake recreates the iconic layers of chocolate sandwich cookie crust, rich chocolate and vanilla ice cream, decadent hot fudge, and creamy whipped topping with colorful sprinkles. Perfect for celebrations or any ice cream lover craving a cool, indulgent dessert.
Ingredients
Crust
- 20 chocolate sandwich cookies (crushed with centers intact)
- 4 tablespoons salted sweet cream butter (melted)
Ice Cream Layers
- 1 quart chocolate ice cream
- 1 quart vanilla ice cream
Hot Fudge Layer
- 11.75 ounces hot fudge topping
Whipped Topping
- 2 cups cold heavy cream
- 1¼ cups powdered sugar
- 1½ teaspoons clear vanilla flavoring (not vanilla extract)
Decoration
- Colorful sprinkles
Instructions
- Prepare pan: Line a 9-inch springform pan with plastic wrap and set aside.
- Preheat oven: Heat oven to 350°F. Line a 10×15-inch baking sheet with parchment paper and set aside.
- Make crust mixture: In a small bowl, add crushed chocolate sandwich cookies and stir in melted butter until fully combined.
- Bake crust crumbs: Evenly spread cookie-butter mixture on the lined baking sheet. Bake for 7 to 8 minutes until set, then remove and allow to cool completely.
- Soften chocolate ice cream: While crumbs bake, remove chocolate ice cream from freezer and thaw for 15 to 20 minutes until soft but not melted.
- Layer chocolate ice cream: Spread softened chocolate ice cream evenly into the bottom of the springform pan. Place back in freezer for 30 minutes to 1 hour until firm.
- Prepare hot fudge: Remove hot fudge lid and microwave for 20 seconds to soften. Stir well to smooth.
- Add hot fudge layer: Spread softened hot fudge evenly over chocolate ice cream layer using a spatula.
- Top with cookie crumbs: Sprinkle the cooled baked cookie crumbs evenly over the fudge layer. Return pan to freezer for 1 hour to set.
- Soften vanilla ice cream: About 15 to 20 minutes before use, soften vanilla ice cream by removing from freezer.
- Layer vanilla ice cream: Remove springform pan from freezer and spread vanilla ice cream evenly over the cookie crumb layer. Freeze for 4 to 6 hours or overnight to fully firm.
- Prepare whipped topping bowl: About 30 minutes before frosting, chill your mixing bowl (stand mixer or handheld) in freezer for 30 minutes for best whipping results.
- Make whipped cream frosting: Remove bowl from freezer and add cold heavy cream, powdered sugar, and clear vanilla flavoring. Beat on medium until powdered sugar incorporates, then on high until stiff peaks form, about 3 to 4 minutes.
- Fill piping bag: Set aside 1 cup of whipped cream in a piping bag fitted with a large star tip for decorating.
- Unmold cake: Remove ice cream cake from freezer, carefully remove outer edges of springform pan, then lift plastic wrap and transfer cake to serving platter or cake board.
- Frost cake: Quickly frost the sides and top evenly with remaining whipped cream using a spatula.
- Pipe decorative edges: Using the piping bag, pipe shell or swirl patterns around the edges of the cake, applying even pressure and holding the bag about ½ inch above the surface.
- Add sprinkles: Evenly sprinkle colorful sprinkles on top of the piped whipped cream.
- Freeze until serving: Place the finished ice cream cake back in the freezer until ready to serve to maintain firmness and freshness.
Notes
- Ensure ice cream is softened but not melted before spreading for smooth layers.
- Use clear vanilla flavoring instead of vanilla extract to keep whipped cream white and prevent discoloration.
- Work quickly when frosting the cake to prevent melting.
- The cake can be made up to 24 hours in advance and frozen until serving.
- Remove the cake from the freezer about 5 minutes before slicing to make cutting easier.
- Prep Time: 25 minutes
- Cook Time: 8 minutes
- Category: Dessert
- Method: Baking
- Cuisine: American
Keywords: Dairy Queen ice cream cake copycat, chocolate ice cream cake, homemade ice cream cake, no bake ice cream cake dessert, summer dessert recipe